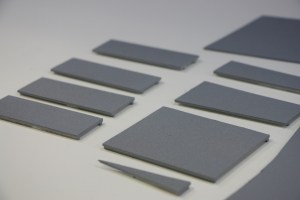
As I had mentioned in my last post I wanted to keep going with the basic scenery. In order to do this I had to get the streets in Jackson in place. In the past my streets were simply styrene plastic painted and weathered. I decided to take it up a step.
One of my sources of inspiration is Model Railroader’s Video Plus(mrv.trains.com). And one of their contributors is a personal favorite. Fellow Twin Citian, Gerry Leone. Gerry is a long time contributor to Model Railroader and now MRVP. His Bona Vista Railroad has been featured many times in the magazine. Anyways, one of the videos he has done is a two part series on making roads.
The main difference between the way I had been doing it and Gerry’s method is that he glues 100 grit sandpaper to the styrene. The end result is that you have a very nicely textured surface when done. If you would like an in depth description of the process I would suggest watching the videos, otherwise I will do a quick recap with pictures.
I was adding two streets to the scene. Both ran from the front to the back. Because of their location, both streets cross five tracks. The first thing to do was to install Blair Line (blairline.com) wood grade crossings.


After they were in place it was a matter of cutting the styrene road pieces to fit in between. I had to add styrene strips to the back to bring them to the proper height.
After that work progressed in the following order:
Primed the sections. Airbrushed the base asphalt color (Tamiya – Medium Grey). Airbrushed a lighter grey for contrast. Masked and then added center stripes. Added cracks with a fine point Sharpie. Added a little more weathering and then installed. In the pictures below you will notice that I had mounted the sections in order with proper spacing on a piece of cardboard. This was done so that all weathering / striping / whatever remained consistent.


Also while I was at it I finished the streets in New Brighton.


A side note. The patches on the streets are for real. The masking tape lifted some of the paint. Instead of trying to match the paint I used darker grey to give the look of a fresh patch.
That’s it for now. Next time we’ll get back on track.
Til then…
