All posts by admin

Wiring Update…

You may be surprised to see this post as a wiring update, as I had planned to finish the track up to the New Brighton yard. Well, I hit a little speed bump and those plans changed. More on the “speed bump” in later as it deserves it’s own post.

Back to wiring. I pulled the buss wires for all most of the lower level, from New Brighton yard up to the town of Brandon. Through Brandon to the helix I am not sure yet of where the signal sections are and didn’t want to guess until the track is down. Below are a couple of pictures of the bus wires pulled and then hooked up to the terminal blocks. A couple of notes before the photos. First is a picture of the wires pulled and bundled, you should have seen the mess of wires before I got them all zipped tied together. Second, I originally figured I would have 8 signal blocks at most on the lower level, actually I now believe it to be 7, so I installed a terminal block with 8 posts. I forgot that there is a north and south track (14 posts), sidings ( another post) and the reverse loop (3 more posts). So I had to add in the second barrier strip along side the original. The color coding is as follows: black – common, red – north bound, white – south bound and green – sidings.

Buss wires in and awaiting installation to terminal blocks.
Buss wires terminating at terminal blocks in electrical cabinet.
Wires pulled for the buss wires, the bundle is for blocks further down the line. The three (white, red and black ) are for this block.
Wires pulled for the buss wires, the bundle is for blocks further down the line. The three (wite, red and black ) are for this block.

After the buss wires were in I started installing the feeder wires. I started by following the tracks around and making a mark by each place one was to be installed. I also put a piece of tape on edge of the upper deck (more on this in a minute) and when I was sure that I had not missed any sections, installed the feeder wires. I drilled the holes and then pulled the wires down through the layout and out to the front edge using a piece of tape to secure them. The tape was a double check to make sure I didn’t miss any of the marks I had made and to hold the wires in place until I soldered them to the buss wires.

Hard to see, the little "V's" mark location of feeder wire locations.
Hard to see, the little “V’s” mark location of feeder wire locations.
The tape strips mark location of feeder wires, waiting for installation. It will all be clear to you soon.
Feeder wires installed, waiting to be soldered. Tape holds wires in place.

Also while I was laying track I had marked the signal block boundaries, which helped when pulling buss wires.

Block end points marked on plywood.

On my last layout I had a rather complicated four digit code for the signal blocks, this time I kept it very simple. I did manage to  get one section of track wired to the buss, but had to call it a night.

First feeder wires soldered to buss wires.


Getting close, until then – Happy Railroading…


Mid January Update…

Welcome to my mid January update. I realize that it’s a boring title, but a bunch has happened and I wasn’t sure which topic to title this post with. But before I get started with what I’ve accomplished since my last post, I would like to get several complaints off my chest.

  1. Short of a home improvement store, do you know how hard it is to find basic Elmer’s white glue. It seems stores carry all types of glue but not basic white glue.
  2. Solder-on wire connectors. Everything is now crimp-on, ask anywhere for solder-on connectors and you get a blank stare.
  3. And solder. With Radio Shack going under and being reorganized there are far fewer around. They used to be everywhere, and now the closest is a bit of a drive from my house, so I called and the answer was…pause..I think we do.

On 2 and 3 above I asked the owner of my LHS (the hobby shop is his retirement career, his first was as an electrical engineer) as I figured he would now where to get them. His answer was on : #2: I have no idea, use crimp-on and solder them and #3: I’m not sure. So when wiring is started I’m using crimp-on connectors and soldering them. As far as solder, I ordered it online .

OK, got that off my chest, sorry.

First, I finished the cork roadbed up to where the cork sheets start in New Brighton yard and no, the cork sheets from Midwest Products have not shipped yet.

Cork roadbed in place up to the New Brighton yard.
Cork roadbed in place up to the New Brighton yard

Not resting on my laurels, I started laying the track. Starting at the switches for the reverse loop (probably because that’s what I had said I going to do in my last post) I headed north through Jackson. Originally, I figured I would lay the mainline, get it wired and come back and do the sidings. I found it much easier (and fulfilling) to do all the trackwork as I went along.

Track work continues.
Proceeding through the north end of town.

The work moved along well, the only thing that really slowed me down was the crossovers. The diverging routes of the turnouts all had to be cut down to fit the spacing between mainlines and sidings.  The track is a mix of weathered track (from the mainline of the old layout), non weathered (from the old staging yards) and a mix of weathered and new switches. The OCD in me can’t wait to get it all weathered.

I laid the mainline through Jackson and about half ways around the peninsula. Then I went back and started working from the reverse loop switches towards New Brighton yard. I got as far as fitting the tracks over the bridge in New Brighton. And then ran out of weekend.

The track work complete for the town of Jackson.
Some of the buildings in place with the track work complete in Jackson.
Jackson, south looking north with the track work on place.
Jackson, south looking north with the track work in place.
Track work proceeding along the berm scene heading towards New Brighton yard.
Track work being installed over the bridge in New Brighton.

But before I could leave it for the night, the OCD kicked in again. I understand the gaps between sections of flex track where the ties are removed is part of track laying, but again it bothers my sense of order. So I hauled out my old bag of ties. These are from BK Enterprises. I’ve had these for longer then I can remember and I’m not even sure the company is still around. I’m sure they are sold for those who have the time and patience to hand lay their own track, but they work great for replacing the missing ties. The great thing about them is that they are slightly thinner then the ties on the flex track and slide right under the rail joiners.

Gaps in the ties from track laying.
Gaps filled with BK Enterprises ties.
BK Enterprises railroad ties. Can't even tell you how long ago I bought these.
BK Enterprises railroad ties. Can’t even tell you how long ago I bought these.

I should have the rest of the track laid for the reverse loop (need to remember to finally pick up that AR-1) and the track up to New Brighton yard in short order. Then I will start running the buss and feeder wires and we’ll see about getting this to the stage of an operating model railroad. With the track work done in Jackson, I will have at the very least, a nice switching layout.

Until next time, Happy Railroading…


Looking Back and Looking Ahead 2016…

Welcome to the Looking Back and Looking Ahead 2016 edition. I reread my last years looking back, looking ahead post to see what I had accomplished and what didn’t make it last year. What I found was that when I started this site was –  that the first year I had pretty high expectations. And while I scaled it back for my second year , they were still pretty high.

The main three from the start of 2015:

FINISH THE CABINETS AND BENCHWORK. Can check this one off.

MINIMUM OF THE MAINLINE IN AND OPERATIONAL / BOTH LEVELS. That would be an obvious miss.

SOME TRACKWORK IN FOR TOWNS. Again,  an obvious miss.

While I believed that the above goals were accomplishable, looking back they were a bit optimistic. Factor in the job change in April that had us traveling almost every other week for a good part of the remainder of the year and they quickly became over optimistic. Even making the cabinet doors and having them installed before Christmas (that my wife had requested ) didn’t happen as not one, but two business trips suddenly got wedged into the time between Thanksgiving and Christmas. And yes my wife understood.

So what would I like to get done in 2016? Well… everything. But realistically I think I’ll shoot for the following:

  • New Brighton yard planned out and cork down.
  • All trackwork for the lower level in and wired.

Pretty simple list, but knowing that the work/travel schedule is not going to lighten up ( at least for the first half of the year ) I think that I should keep it realistic.

Where am I at right now on the list? I have the yard in New Brighton started, as far the track layout goes, however I keep tweaking it as I mentally operate it. The biggest problem I have right now with the yard is that when the track plan is finalized ( the next couple of days ) is that I won’t be able to lay the cork roadbed for it.

Why not ? Well it seems that Walthers ( walthers.com ) is having their “ biggest track sale of the year ” and one of the sale items is the Midwest Products ( midwestproducts.com ) cork sheets that I use for yards. They are out of stock with an unknown restock date. I have to wait till  Walthers restocks and ships.

I won’t halt work until that happens, instead I will start the trackwork. The starting point will probably be where the switches are for the return loop and work towards the helix, wiring as I go.

I am finding that I need to actually get trains running or I am going to start loosing interest/focus with the layout. Not a good thing.

Additional things on the list could be:

  • Start the helix once track is in. At minimum I will cut the wood for the helix when the weather gets warmer.
  • Cabinet doors. No, my wife won’t let this one slide, but I should be able to put it off again till the weather is better (not winter).
  • Install the supports for the upper level valance/ lights.

Am I unhappy that I didn’t make my ( self imposed ) goals, sure, I had hopes of having things running by now. But over the last weekend as I was reading other modelers year end updates I have found that there are others who after 4 to 6 years are just finishing their mainlines. After a year and a half I’m not doing to bad.

I will have an update on New Brighton yard soon.

Till then, Happy Railroading…

Happy New Year…

Wanted to say Happy New Year to all of you out there and thank you for a great 2015.

A quick note about my last post ( The Town Of Brandon ). It was written 2 weeks ago, but because of some glitch in some program somewhere. I was unable to post it until last night. Kudos to all who tried to help fix the problem ( customer support at WordPress, the company hosting the site and my son, who teaches coding, game design and other a variety of other computer programs.)

I have made progress in New Brighton, although as I keep planning I am finding ( what I hope ) are better alternatives to what I originally planned. Will have a post on that in the next day or two.

I will also have a year end update in the next couple of days. What I have accomplished, what I didn’t and what I hope to get done in the coming year.

And again, Happy New Year, I hope it’ a great one for you!

The Town of Brandon…

I have finished laying the roadbed for the town of Brandon. As I have mentioned before, Brandon is a agricultural based town smaller than Jackson. As it is just ahead of the helix the mainline cuts across the benchwork at an angle. This actually works out well as the town is then laid out at a right angle to the mainline adding visual interest to the scene.

In my last post I had talked about the over planning that had taken place with this town. Way too much ( and complicated ) track work. I slimmed down the plan to:

The mainline, a team track, a siding for a lumber company and a siding that will serve a grain elevator, an oil dealership and as the lead for the gravel company siding.

And while I had said before that I was using bits and pieces of other layouts as Layout Design Elements ( a term coined by Tony Koester ) the layout for Brandon came from an old photograph of a small Midwestern town. If it worked for the real thing it should work for a model railroad. The cool part is that there is almost no compression to get it to fit.

The thing I liked best about the design of the town is the variety of cars that will be needed to serve the few industries in town. Boxcars for the grain elevator, team track, oil dealership, lumber company, and supplies for the gravel company. Hoppers for the gravel company. Tank cars for the oil dealership. And last but least, flatcars for the team track and lumber company.

Should be a lot of action in a small space.

Anyways, got the plan drawn out and the cork down for the roadbed. I also put in the cork for the road crossing the tracks. There will be a few commercial buildings to suggest a town. They will be in between the road that crosses the tracks and the lumber company.

The town of Brandon, south looking north.
North end of town with the sidings for the lumber yard (right side) and the gravel company ( left side ).

In the above photo you can see the two sidings, one for the gravel company and the other for the lumber company. They don’t continue because: for the gravel company I am waiting to get the backdrop in place, which won’t happen until the helix is in place and for the lumber yard I don’t actually have one yet and I won’t lay the cork until a know exactly what I’m dealing with.

Brandon, looking south.

One last photo;

The elevator with a home road boxcar.

You can see in the picture above that I have started to decal the home road boxcars. I am currently working on a logo for the railroad that will go into the empty space on the left end of the car.

Next up is finishing the planning of the New Brighton yard.

Stay tuned.

Until then, Happy Railroading…


Early December update…

As I may have mentioned earlier, track planning is not my strong suit. With that in mind I have been working on the yard in New Brighton with some success. However, what I want and what will fit, although close, hasn’t been quite working out.

So I decided to switch gears and work on what I thought would be something a lot easier. That would be the town of Brandon which is in between Jackson and the helix. As I said before, I envisioned it as a smaller town than Jackson, but still big enough to generate enough traffic to make it important to the railroad.

My first attempt at a plan for this town was, although not a disaster, far more complicated than I wanted. I added in a lot more sidings  than was needed, almost a small yard.

First attempt, first view.

As you can see in the picture above or maybe not, as things are only penciled in, the switching was quite extensive and include a two track yard. Also there were two tracks for the grain elevator which was totally unnecessary. Not shown are the siding for the team track next to the depot as well the lead off to the gravel company. Like I said, track planning is not my thing and I tend to overdue it.

So I pulled back and somewhat simplified it.

Second attempt, from the south.
Second attempt, north end of town.
Second attempt, north looking south.

First I removed one of the tracks next to the elevator, as well as the one of the “yard” tracks. There is still one siding track that connects between the elevator track and the track that leads off to the gravel company on the north end of town. The team track next to the depot remains and there is a track on the north end that will serve a lumber yard. That track can be seen in the middle picture. I am considering a fuel oil dealer served by the “yard ” track, but not sure, we’ll see.

I should have the final for Brandon done soon. Then I’ll  get the cork roadbed in place. Once I have the New Brighton yard finalized I will start laying track from the staging yard to the helix. Then will come the wiring, and then…GASP!… I will actually be able to run a train.

It’s going to happen, so stay tuned.

Until then, Happy Railroading…


Late November Update…

First and foremost, to all my US friends… Happy Thanksgiving. I hope you had a good day filled with family, friends, food and football.

I have read and reread my last post and I found it rather long and wordy. What I was trying to say in a nutshell was that until I got the lower level mainline in, the helix made no sense.

So with that in mind I installed the last couple of pieces of plywood for the New Brighton yard. This will tie together the staging area with the rest of the layout. Once installed, I realized a couple of things that probably weren’t going to happen.

New Brighton yard towards west wall.
New Brighton yard towards east wall.

In the first picture the mainline is going to loop around near the backdrop. I had hoped to fit a turntable and roundhouse inside the loop. The turntable is a must as I need to turn the steam engines, however the roundhouse will not fit. I am looking at several options to give the impression that there is a roundhouse here without actually having one. Also the back of the tall red building to the right  will be up against the backdrop hiding the helix.

In the second picture near the bottom edge, you can see a couple of brick walkways. Again, I had hoped to have the station for New Brighton here. But a station would take up a lot of real estate that I need for a yard that already is a bit on the small side. I have the strips in place near the edge, again trying to create the impression of a station with out the station.

I have already started drawing out the track center lines for the yard and  mainline. Once I have that more or less finalized I will see what I will be able to fit into the rest of the space.

Any work on the actual layout will be a bit slow between now and Christmas. My wife would like the cabinet doors done before Christmas, as there will be extended family over for the holidays and the layout is in plain view from the family room. I actually would like them done too, as this will remove the distraction of what’s below the layout.

I will keep you updated, till then – Happy Railroading…


Early November update…

So I FINALLY got the base for the helix in place ( more on the helix later… ) and I thought that after all this time it would be kind of an epic moment. Actually it was more anticlimactic. It wasn’t all that hard, once I had the time and materials it went rather quickly and dropped into place.

Once in place, I laid out the outline for the helix itself. With that established, I laid out the return loop because I needed to get that in place and running before I could build up from there. As I had mentioned before the entrance track swings off the main and cuts through the backdrop, it then swings around and comes back across the bridge that is part of the berm scene  ( more on that in a minute also ).

In order to get from the main to the helix base required a piece of plywood subroadbed, so first I made a cardboard template.

Helix base in place, outline of helix drawn in although hard to see in this picture.
Making a template for the return loop leg.

As you will notice I also had to cut a piece of the upright support in order to get the track through the backdrop. With the template in hand I went out to the garage to cut the piece out of plywood. Took no time at all and the piece dropped right into place.

Cut the subroadbed using the cardboard template, cork roadbed in place.

As you can see, everything was moving along so well that I had the cork roadbed in place before I realized that I had not taken a picture of just the plywood piece in place. You can see towards the top of the picture that the cork roadbed is laid all the way around and comes up just short of the bridge.

It’s at this point that I realized that I was moving way to fast. First of all, if I had not stopped and laid the cork up to the bridge, I then would have started to lay the track and if I had done that I would have then had to tear some of it up. See the picture below and I will explain.

Alternate view of the helix base with return loop.

As you can see in the picture above, the street is not finished or mounted to the plywood base. In order to do that I have to pull out the bridge abutments ( which also needs to be mounted ). So I stopped and I will have to get the street painted and permanently mount both the abutments and street.

More importantly I realized that even if I get the return loop in and running, building the helix is kind of stupid.

I think I have been fixated on the helix because I have never built one.  I have built layouts before, built benchwork, laid track and wired it. I have built scenery and backdrops, but I have never built a helix and it is one of the untried challenges that I have been looking forward too. If I started it now, it be a helix to no where. If you can’t run a train to the helix, then what use is the helix.

I mentioned early on that my plan was to work linearly and building the helix now would be jumping ahead. Besides, if I don’t get the rest of the subroadbed in place then the starting height of the helix is just a guess.

So the plan now is to get the rest of the subroadbed in place on the lower level. I started with the next town in line between Jackson and the helix. This will be the town of Brandon, a smaller agricultural based town. I installed the base for this town and was able to figure out where the tracks will enter the helix, although the exact height has yet to be established.

Planning the town of Brandon on the approach to the helix.

With the starting point for the helix established I worked around the outline of the helix and marked where all the support risers will go. It probably isn’t all that important, but it gave me an idea if there will be any conflicts with anything else that would make installation a problem.

Figured out where the actual helix would start.
Marked all the riser locations for the helix, I wanted to make sure there would be no interference with anything else.

The only other base plywood to install is for New Brighton, I have it cut and just have to install it. After it is in I will begin laying out the mainline and then the sidings. Then the track, wiring etc… Get the mainline running to the helix and then the helix.

Till later… Happy Railroading


Twin City Model Railroad Museum, a sad day…

We all know how we feel when we lose a Local Hobby Shop, if you check out any of the forums there is always someone lamenting the loss of another LHS closing down. We returned from another business trip last Tuesday, Thursday on a whim I picked up a copy of the local paper ( I had cancelled my subscription about a year ago as I read several different sources on my Ipad ) and on the front page of the local section was a story about a local club that has to vacate it’s space without knowing where they will go.

The Twin City Model Railroad Museum has been in existence since 1934. Originally housed in the St. Paul Union depot until they had to move because of it closing down. In 1984 the St. Paul Port Authority offered the club space free of charge in a newly remodeled Como Shops car shop that was set up as a shopping/entertainment center. Next door in a remodeled machine shop was the Children’s Museum. Also in the area were business offices, hotels and residential housing. All heated from a central location, the area was known as Energy Park. The shopping center itself was known as Bandana Square.

One of the stipulations placed on them by the Port Authority was that the club would have to be open to the public on a daily basis. Admission was free, but donations asked for. I remember finding them early on and stopping by on a regular basis to watch the progression as the club built the layout. In 2003 the Port Authority sold the Bandana Square complex to a private management company.

One of the first things that the management company did was to let the club know that they would have to pay rent like everyone else. The club had to switch from free admission to  paid admission. It wasn’t much but it probably hindered some from stopping by.

As rents rose, some of the small shops and restaurants moved out, new ones moved in and tried to make it. With a shifting occupancy and some vacancies, traffic to Bandana Square dropped.  In addition to this, the Children’s museum moved to a newer and larger space in downtown St. Paul. The management company started to shift it’s focus to office space and now it is a medical office building. With a lack of traffic and becoming more of a destination the club struggled with meeting their rent.

And now they can’t make rent with available traffic and they have to leave.

My kids have grown up with me dragging them along with me to see the layout as it grew and neared completion. My boys never caught the model railroad bug ( though they are always asking to see progress downstairs as they appreciate what goes into building the layout ), only my daughter was interested in model railroading and was happy to tag along or hang out with me as I worked on past layouts. So I was very saddened to see that I would not be able to share this with my grandson.

I also realized that I had never taken any pictures of the club’s layout. Why would I, it’s been around for 81 years and would be around for years to come.

So with my wife in tow this time ( no, she had no problem with tagging along, she has always appreciated what goes into building a layout of any size and knows what goes into every little detail ), I headed out to capture the layout as they will have to shut down by October 26th.

Below are the pictures I took as well as a trackplan of the layout. The layout itself was featured in a Model Railroader article in 1999. Also, though I took somewhere in the neighborhood of 200 pictures, the ones with the trains in action didn’t turn out. The lighting was not as bright as I would have liked, I prefer to shoot without a flash if possible, and the trains were running a little fast (I’m sure to hold the attention of those who don’t understand scale speeds) , so the trains were a bit blurred as they moved past. I will add commentary about those things a do know about.

The Layout. As you can see by the copyright it was featured in Model Railroader.
View of the Minneapolis skyline.
Scrap yard in the lower river section of Minneapolis.
The Mississippi river scene.
Signal tower along the Mississippi river.
A freight along the river.

You will notice in the above photos the painted backdrop scenery. The club installed the backdrop and had painted it a light blue ( oh doesn’t that sound familiar ), an artist stopped by one day to see the layout and volunteered his services to paint the backdrop if the club so desired. You can bet that they hopped right on that offer as no one in the club wanted to do it. I always felt sorry for the guy as much of they scenery and buildings were in place at the time.

The town of Mattlin.
The Great Northern depot in Minneapolis. A beautiful reproduction of a majestic structure that the city saw fit to tear down because it didn't fit in with their plan. After the teardown the lot sat empty for decades.
The Great Northern depot in Minneapolis. A beautiful reproduction of a majestic structure that the city saw fit to tear down because it didn’t fit in with their plan. After the teardown the lot sat empty for decades.
The Mississippi Street roundhouse scene.
A compressed version of the Northern Pacific's Como Shops, now home to Bandana Square.
A compressed version of the Northern Pacific’s Como Shops, now home to Bandana Square.
The town of Hamline.
The streetcar barn in Hamline.
The street car line leading from Hamline to Minneapolis.
The streetcar line leading from Hamline to Minneapolis across the 3rd street bridge.
A passenger train crossing the iconic Stone Arch Bridge. The bridge still exists and is a walking path/bicycle path from Northeast Minneapolis to downtown.

The Stone Arch Bridge ( yes we capitalize it here in Minneapolis ) is an iconic structure. A club member and his father first built the basic form for the bridge and then hand cut 5000 pieces of basswood for the bricks on the bridge. He then cut and laid the ties on the bridge for the track.

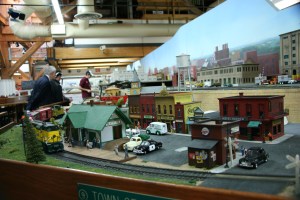
The best overall view of the layout that I could get, the roundhouse scene to the right got cut off.
The diminutive entrance to the club layout, at one time it was a bit grander when the building was a shopping/entertainment hub instead of a medical office building.
The outside of the Bandana Square building. At one time it was the Northern Pacific's Como Shops car shop.
The outside of the Bandana Square building. At one time it was the Northern Pacific’s Como Shops car shop.

I had not wanted to broach the subject with any of the members of the club as I felt they were pretty discouraged about the situation. But listening to them talk to others, it sounds as if they have found or are close to securing a new location for the club and layout. I can only hope so and wish them the best. Though I can share model railroading with my grandson on my home layout, there are others who may never be introduced to the hobby without someplace like the Twin City Model Railroad Museum.

Best off luck guys.

And Happy Railroading…