All posts by admin

Happy Victoria Day…

Happy Victoria Day to all my friends north of the border. Why I would I even notice that today is Victoria Day? Well when you live in the US and work for a Canadian company you get all the US holidays off as well as the Canadian ones.

With summer upon us, days are busy with work and evenings and Saturdays with house and yard work. Sundays are “Date Days” with my wife, where we spend the day out of the house doing whatever. Very important when you both work out of a home office.

So with a sudden day off I was able to get downstairs. When I last left off in the train room I was working on buildings for the business district in New Brighton. My last project for the third block was combining a couple a buildings to make a hotel. This will represent the Exchange Hotel in New Brighton. It was “The” hotel in the town although in reality it was long gone by the 1950’s. Since it was important to the cities history (and I couldn’t think of another business to put there) I wanted to include it in the block. The problem I was having was it wasn’t turning out as I had hoped. I had joined the buildings and made an awning (not the right word, but the right one eludes me as I’m writing this) and vertical sign, but it just wasn’t working. So work came to a halt.

The base buildings being converted into hotel.
Buildings joined with awning (?) and vertical sign in place.
Overview of what the finished block will look like.

So with a found day I turned back to the layout. And I finished the track work in Brandon. The mainline is in to the crossovers on the north end of town and all sidings (except the spur to the gravel company) are in place.

Brandon looking north with the track in.
Brandon looking south.

In the photos below I show the three major businesses. The creamery building is a stand in for the feed mill, it’s from the Walthers ( walther.com ) Consolidated Dairy kit, but is the exact same building as their Columbia Feed Mill. The other stand in is the oil dealer. The one in the photo is pretty beat up and I plan on getting a new for the space. The grain elevator will be used.

The stand in building for the feed mill.
Again a stand in building for the oil dealer.
The grain elevator.
The grain elevator.

North of the crossovers is the curve that heads into the helix. I worked out the elevations for it so that I can cut the risers for the subroadbed. Once they are in place I will lay the track and then start work on the helix. Although before that happens I will be making the doors for the cabinets. I told you my wife wouldn’t let this one go and it will be nice to get rid of the visual clutter from the open cabinets.

I hope all goes well with you and enjoy your summer.

Till next time, Happy Railroading…


I warned you…

I warned you in the beginning of April that I might not get much done and well, I was right. Although not something I was hoping to be right about. I have been out of town a lot for work and when I’m home it’s been all about catch up.

First a confession. About mid March you may have noticed that there was something of a work slow down. Before that I was marching right along with laying track, getting it wired up and running a train back and forth across what was down. Then there was a switch to working on buildings. Confession time. My wife and I were out and about on a lazy Sunday with nothing much to do. Being kind of bored we decided to hit the “Parade of Homes” here in the Twin Cities. For those unfamiliar with a Parade, it happens spring and fall when all the builders showcase their latest and greatest.

Now we weren’t looking for a new home, but rather what’s new and hoping to pick up an idea or two for what improvements we could make at home.

Long about the third model we walked into we were both floored. (no that’s wasn’t meant as a pun). The house was perfect. We had talked over the last couple of years what our “Golden Years” were going to look like. One of the things we have talked about was what happens if navigating stairs became an issue (we both have Parents/ grandparents/family members where this was/is an issue) and thought that having a house where all the main living is on one level would keep us in the house longer.

Anyways, you would have thought that they knew that my wife was  coming. Not only was the house everything we had talked about in regards to main floor living (yes it has a basement) and then some, it was also painted and staged (you know, all the “stuff” they decorate with that makes it look lived in) with all the things my wife would do. She had mentally moved in before we left the model. After about three weeks of picking out all the things one picks out for a new home we decided that at this time to just stay put where we are right now. We love our present home, but this still could happen but not in the near future.

That’s why the “work slowdown”. I didn’t want to be working on something that I was going to tear down. And once we decided to stay put, the travel for work started.

Anyways it has made me think about what I’m doing downstairs. Going forward I have to plan on being able to disassemble the layout (because believe me, she hasn’t let this one go. Again, know your audience).  This won’t stop me from moving forward, I just have to have an eye on moving it.

About the new space. It’s approximately the same square footage, but without all the things I had to work around in the present space – ei. support posts, utility room, store room and stairs. Dimensionally it’s the same, but I actually pick up space.

Back to reality. Tonight I finally had about an hour to play with and started working on the track work in Brandon. I spent most of that hour rounding up all my tools and supplies for track work as they had been scattered because of various other projects. I hope to have a post on actual progress very soon.

Till then, Happy Railroading and thanks for sticking around…


Early April Update…

This is my early April update ( hoping I get enough done between now and the end of the month to have a late April update). With work at home and travel for business, I haven’t had large blocks of time to work on anything major. I have had time to keep working on my main street buildings though.

I have finished off the Bookstore building. When I left off last time I was working on the roof. To get a little more depth to the roof I used masking tape cut down to a scale size to simulate rolled roofing material.

Installed rolled roofing using masking tape.

With a coat of flat black paint it turned out pretty well. I didn’t airbrush it, but rather brush painted it. The color is less uniform and looks more like a tarred roof.

And with of flat black paint we have a finished roof.

I will add fine details after the building is in place.

To finish this block I pulled a couple of old buildings I had previously built out of one of the storage totes. One was City Classics “food Market” and the other was a nondescript brick building. It’s a Kibri kit reboxed and sold by Walther’s. The market needed some touch up to the paint and still needs some kind of interior. I have been looking for suitable photos to print. It has large windows and even with the window banners in place, the empty interior is still obvious.

The brick building on the other hand needed a lot of help. It needed a coat of paint for the brick and stone work details. I added an awning and a photo of a hardware interior. Why a hardware store? I had a Woodland Scenics  dry transfer sheet that had a large hardware store decal that looked good on the blank wall that overlooks the parking lot between it and the bookstore. Thus a hardware store.

Also the buildings were chosen for there height. The buildings taper down from the bookstore to the market. After these commercial building will be a residential neighborhood and I didn’t want a abrupt change visually.

Anyways, here is what it looks like:

The mid block, the hardware store.
The block from the other end.

Again, fine details will be added to the block once installed on the layout. These will include: street lights, road signs,  parking meters, trash cans, fire hydrants, etc. Also, the streets will be weathered and markings applied once they are all in place.

In the past I have always done all this work on the layout. Doing this on the work bench has been much easier and more enjoyable.

I have one more commercial block to finish and will be starting that soon.

Stay tuned and Happy Railroading…


March Update…

I apologize as this may be my only March Update. Work is very busy and will be so through the end of April. Add to that spring is here early and there are things that need to be done around the house. If I have a chance I will fill you in on what’s going on, if anything.

One of the things I have been working on when I get a little time downstairs is getting ready to wire up the staging yard. As I had mentioned, I plan on being able to cut the power to the individual tracks. Wanting more then a just the position of a toggle switch to tell me which track is on or off, I had planned on having an LED to indicate whether it was powered or not. Now for me wiring an LED is kind of scary because of the need for the proper resistor. And yes there are several different ways of figuring out  which is the proper size resistor. But being slightly math impaired, I would stare at these and my head would start to swim and they would simply make no sense.

So after reading many different articles on it (coming away more confused than when I started), I hit the forums. The basic take away that I got was that a 1.0K ohm resistor was a good starting point. I ordered a small selection of different values of resistors figuring that I would start big and work down till I found which worked best. If I killed a couple of LED’s along the way it was OK as I have plenty.

Turns out the 1.0K ohm 1/4 watt resistor was the way to go. I’m using 3 lead, bi-color (red/green) LED’s and DPDT on/on switches. I prepped everything and as they say, it was off to the races.

Making the panel lights, everything cut, stripped and ready for assembly.
First assembled light.
Yay, they work. No one is more surprised then me.
First one installed in fascia.

The other ongoing project on the workbench is a Walther’s Kit (walthers.com) of the Argosy Booksellers. I think this kit was first released by Magnuson Models as a resin kit. Walther’s then released it as a plastic kit, being that it was a model of their original home. It is a good subject, but the kit takes a lot of work as everything is added as layers. Think some of the German manufacturers like Faller or Kibri. I believe that this is the only kit that they tried this way and it’s just as well. While the Germans have this down, I’m sorry to say Walther’s failed.

The different layers are: the basic brick wall, the stone pilasters, the concrete (?) sills and headers for the windows, additional stone work trim and then the windows and doors. Some parts fit from the front and other pieces fit from the back, depending on the wall section. Even then, pieces that are mounted from the front on one wall, might mount from the back on a different wall. The castings aren’t that great either. They needed some filing and sanding to get them to fit properly. I had planned on painting the different pieces first and then assembling them but gave up on the idea.

So I assembled the wall sections, leaving off the window castings. These I painted separately and applied them after the walls were painted. I painted the whole assembly the brick color and hand painted all the trim work. Like I said, this has been an ongoing, long term project. My progress so far:

Argosy Booksellers kit, for the New Brighton scene.
It has a big flat roof, and desperately needed some details.
It also needed a sidewalk out front, although not a simple install.
Sidewalk in, now it just needs to be cleaned up and painted.
Sitting in place, wanted a sense of how it fit into the scene and what buildings would be next to it.

A couple of things that slowed me down were the roof, which is just a big flat piece of plastic on top of the building and adding the sidewalk. Since the building will be on the lower level, the roof is very evident. I added a couple of taller vent pipes, as well as a series of vent stacks. Also a roof access was added. Overall what was added all looks plausible, at least to me. I’ll probably add a TV antenna or two to finish it off. The last thing is to decide what type of roofing to add to finish it off.

The sidewalk was it’s own challenge. I use the sidewalks from the Walther’s street system. The problem is that they are not as wide as the sidewalks with their Merchant Row series of buildings, which form the basis of the scene. In order to widen the sidewalks, a piece of .080 x .100 styrene has to be added. Not a big deal, other then getting them to sit flat against the sidewalk, then sanding them to blend. All that’s left is to figure out the roofing and then add the printed sheets to the windows. And lights. And then weathering.

Great little projects when one doesn’t have a ton of time.

Like I said, if anything else happens I’ll let you know. I appreciate your patience and understanding.

Till later, Happy Railroading…

End of February update…

Hi, it’s been a bit, sorry about that. In this end of February update I’m going to cover a few things. So here goes…

First – Picture problem fixed.

Actually I’m not sure there was an actual problem, I’ll explain. I got a new camera as my old one was getting outdated. If only in terms of current technology. It’s an old Canon Rebel XTi with a 10 megapixel sensor. A great camera that’s still working perfectly. But because  I use the camera for work too, it could be better. So I got a new Canon Rebel T6i that has a 25 megapixel sensor and a faster processor. Figured I could shoot better (more detailed) pictures of the layout, plus I can shoot video with it also. Turns out the website didn’t like the larger pictures, 10mb with the new camera as opposed to 3mb with the old. So for this post I shot the pictures with the old one. It was that or I had to “dumb” down the new camera. Any way, as I said, problem solved.

Second – The “speed bump”.

As I had mentioned in an earlier post, before I wired the track I had down, I had run into a speed bump. It was quite literally a speed bump. As I was laying track from the turnouts from the reverse loop to the yard at New Brighton over the bridge in the berm scene, I failed to notice a bump in the tracks at the end of the bridge. It was only as I was pushing a string of cars over the tracks that I had laid that I found the problem. There was a 1/4″ rise in the tracks over a 6″ length of track. A 1/4″ rise means the cars uncouple, not good.

The evil "speed bump".
The evil “speed bump”.

Turns out that I failed to screw down the plywood base that this end of the bridge was mounted to and the plywood had a slight warp to it. I know that I had looked at the plywood sticking up and had thought that I would have to do something about it, but my brain never made the connection. So I had to pull up the track, the roadbed and the subroadbed to fix the problem (that’s why I went ahead and wired the rest of the track and came back to this). Any ways I have fixed the problem.

The arrow shows the joint that had to be leveled in order to level the tracks.
The area that had the "speed bump", now repaired.
The area that had the “speed bump”, now repaired.

Third – Track down and wired.

Just so you know, I haven’t been sitting on my behind. I have the return loop in and wired. Held my breath, as I have never used an auto reverser (the AR-1) before, ran a train through it and it worked perfectly.

View of the berm scene with the return loop in the background.

Next, I laid the track from the switches to the staging yard and wired them up.

The Loop around the engine facility into the yard.
Beginnings of the yard at New Brighton.
The small stock yards and meat packing plant.

I only have the “main line”  laid through the yard as I have yet to figure out the rest of the yard. The background buildings are temporary, as I have yet to figure out their  placement.  The stockyards/meat packing plant is important because if I had not talked about it before, New Brighton had the largest stockyards west of Chicago and needed to be included.

The last “industry” in the yard is the power plant. It hides the hole  from the staging yard to the “real world”. I had planned on a single hidden track in the staging area for it, but found that I could put two tracks (switched) into the space.

The power plant that will hide the hole to the staging yards.
The throat for the staging yards and the hidden track for the power plant.

So there you have it. I can now run a train from the area just before the staging area to the town of Brandon or from Brandon south through the return loop and back to Brandon.

What’s next? Wiring the staging yard. Only a deal because each track will have a switch to turn it off so as not to have a bunch of sound equipped engines idling away. Then, laying the track in the town of Brandon itself. After that? It’s on to the helix and the upper level.

Wow, for some reason the upper level never seemed to be on my radar. How cool is that.

Till next time, Happy Railroading…


The Trains Are Running…

Yes, that’s right, the trains are running. Actually, they were running shortly after we got back from Milwaukee. However, I’ve been banging my head against the desk for the last week trying to upload pictures of the historic event to my website to no avail. I also shot a short video so that you could actually see it, but the file was too big to upload even if I could. If you want to see it, it’s available at my instagram account, same name.

As I left it several posts ago, I had wired the feeders and pulled them to the front. As I started wiring them to the buss wires, I was thankful that I had drilled all the holes for the wiring. The buss wires were perfectly located for soldering the feeders. It was a little dark under the edge until I realized that instead of just working around the rope light that installed for aisle lighting, I could plug them in and behold, a well lit space that made it easy.

After they were all wired, I cleaned all the tracks with a brite boy and was ready to roll. Then I realized that my DCC station was at the end of the stretch that I had wired and I would be unable to follow the train. So I temporarily mounted several UP-5 panels along the front, got them hooked up and THEN I was ready to roll.

I dug out a BLI 2-6-6-2 locomotive, why, it’s an articulated locomotive and it had sound. Got it on the tracks, turned on the power to the DCC system and stared at the throttle. Yup, it took me a few seconds to remember how to power everything up. But when I did and heard the sound come up on the engine, I was pretty sure you could hear a chorus of angels. It was a glorious moment. Turning the knob, the engine started moving and no, there is not a downside coming. Everything ran perfect. I added a dozen boxcars behind it and ran it back and forth over the twenty feet of track without any problems. Yay.

So there you have it, the trains are now running.

Now to complete the reverse loop and I can double the length of a run ( yes, I picked up the AR-1). Then get the tracks laid up to the New Brighton yard. I also now have the sheets for the yard, so that can be started too.

Hopefully I’ll get the picture problem worked out before next time.

Till then, Happy Railroading…

Kalmbach Publishing…

We had planned on stopping at Kalmbach Publishing on our way home as Waukesha is outside of Milwaukee on the way to Minneapolis. I thought it was farther than it was and it could have been a day trip. I would have preferred to have called ahead, but was unsure when we would get there. I’m sure they would have liked a call, but the guys at Walther’s had said that you didn’t really need to.

Kalmbach Publishing, home of Model Railroader and some other magazines.

We walked in and over to the receptionist, who asked if she could help us. Trying to sound intelligent and knowledgeable, I just kind of babbled. It took just a second and my wife stepped forward and told the receptionist that I was a model railroader and was wondering if we could possibly have a tour. She looked at me and smiled at my wife, said sure and called upstairs.

About 5 minutes later Associate Editor Eric White came downstairs. We exchanged the usual pleasantries, where were we from, what scale and road and such. Then hi smiled and said lets get started.

Again like Walther’s and their employees, everyone at Model Railroader were exceptional. Even though you are interrupting their work day, they all take time to stop and talk.

First stop was their history case. A couple of things that caught my eye.

The only surviving engine from John Allen's "Gorre & Dephetid". It was out at a friends house for repairs when a fire destroyed John's layout.
The only surviving engine from John Allen’s “Gorre & Dephetid”. It was out at a friends house for repairs when a fire destroyed John’s layout.
3-D mockup by Gordon Odegard for the Clinchfield project layout.

Then a swing around the Editorial offices, where the only one in his office was Steven Otte. The senior editors were all in a meeting. Then as you swing around you come to the area where the magazine and page layouts are taken care of. After that was a large hallway where all the older project layouts that Model Railroader still has are parked.

The "Beer Line" layout.
The “Beer Line” layout.
Scene from the Beer Line layout, Al Kalmbach and crew with the complete first run of model railroader magazine. This is from a picture from 1934.
The Virginian project layout.

Then it into the Magazine’s workshop. This is where they build the layouts that you watch on the webcam. Eric even offered me 15 seconds of fame by asking if I wanted to step out in front of the camera so I could go live on the web. Sorry, I declined. However, Cody Grivno was in the shop working at getting an engine cleaned.

Cody in the workshop cleaning an engine.

Although he kept working on his project he stepped around and we had a very nice chat. Turns out he’s from northern Minnesota and would come down to the cities to hit the local hobby shops. Again, it amazes me that they are so willing to take the time to talk and make you feel at home.

After some time talking we moved on. Next up, the MR&T. I wasn’t disappointed, however after seeing it in the magazine so many times, it’s not how I imaged it. I can’t explain it, it just falls into place different then I expected.

Below are some shots of areas that I remember as articles.

Harbor scene from the MR&T layout with the associated magazine project page.
Another magazine project on the MR&T.
And another...
And another…

And then we were done, back down to the lobby where I thanked Eric profusely.

Two side notes:

First, out of curiosity I asked Eric how they decided who would give tours, he sheepishly admitted that everyone else was busy and he was texting his wife. He got picked.

Second, if you think your workbench is cluttered, below is a shot of the editor’s office for “Classic Trains”:

The "Classic Trains" editor's office, and I thought my workbench was bad.
The “Classic Trains” editor’s office, and I thought my workbench was bad.

Lastly some shots from the lobby.

Tribute to Al Kalmbach, fifth still from the bottom on the left is the picture recreated on the Beer Line of the first publication.
More history, the first printing press, Al's first homemade train and stories and awards for Kalmbach Publishing.
More history, the first printing press, Al’s first homemade train and stories and awards for Kalmbach Publishing.
Another photo of Al and the first run, with his philosophy.

I cannot not tell how much I appreciated how welcoming everyone we met were. I would highly recommend a visit to Kalmbach Publishing and Walther’s if you are in the area. They would probably appreciate a call if you know when you can stop by, but they seem happy to accommodate you if you don’t. Kudos to them all.

Next time, what has been accomplished downstairs.

Happy Railroading…


Walther’s Showroom…

Our second attempt at seeing the Walther’s showroom was far more successful then our first. We got there about 11:00 in the morning and walked on in, check that one off my bucket list.

Walther's home office / show room / warehouse.
Walther’s home office / show room / warehouse.

Upon entering the showroom you are greeted by a large HO layout. It is beautifully done, obviously highlighting Walther’s products. Off to the side is a decent sized N scale layout, again very well done.

As you enter the showroom.
The N scale layout.
The N scale layout.

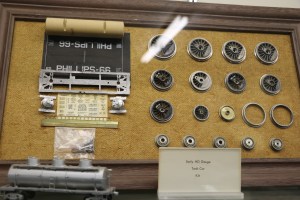
Around the perimeter are display cases with finished structures, didn’t ask but I assume that they are probably the ones used for the photos for the Walther’ catalog. One case was more of a history case. It had old casting blanks and pieces cast from them, old office equipment, old kit parts and a collection of William Walther’s (the founder of the company) office and personal items.

Blanks for engines castings alongside the cast pieces.
Ye olde billing machine.
In the memorabilia showcase.
More items from the case. Mr. Walther's personal items.
More items from the case. Mr. Walther’s personal items.

The merchandise on the floor isn’t anywhere as extensive as you would think. Pretty much all HO (sorry to all who model other scales) and mainly engines, freight, passenger and structures. All Walther’s products. Of course when you have the whole warehouse behind you, you don’t need a huge display space. They have two workstations with all the catalogs and computers to check stock. Write down what you want, hand it to the guys at the counter and they run out and get it for you.

Two workstations where you can check stock before ordering.
The main counter and pick up desk for your in showroom orders. Chris, who gave us a tour of the facilities, is to the right.

While I was looking over the shelves, my wife hit the catalogs and computers. She had gotten me a static grass applicator for Christmas, but didn’t understand exactly what it did. I had explained how it worked, so when we hit the showroom, she wanted to get some static grass for it. As we were paying for the order, we got to talking with Chris, the guy who was helping us. When he heard we were from out of town, he asked the magic question. Would you like a tour of the facility?

Absolutely! So with the visitor badges clipped to our coats, we started our tour. Eyeing my camera, Chris let me know that although you can take pictures in the showroom, the camera was forbidden everywhere else in the building.

Having worked in a auto parts warehouse in my younger years, I was very familiar with the operation in the back. The way orders are generated, filled and shipped. Nothing new here. It was still  great to see the workings in back, but Chris being the seasoned tour guide, was able to make it all interesting. He supplied the whys and hows of the way things were done, but more importantly, some history and trivia of the place.

We were shown everything, front offices, employee spaces, overstock spaces, general warehouse and shipping. The only place that you are not allowed is New Product Development. Wasn’t a problem, but later as I thought about it, it would have been cool to see what’s coming. As I said, Chris was great as a guide, but everyone else was really nice and said hi. Obviously I wasn’t the first model railroad nut to be through there. It’s nice that they are all pleasant, even though they are trying to get their work done.

I think it was about 1:30 by the time we left. If you have the chance, it is a great outing.

Next stop – Kalmach Publishing. And I thought Walther’s was cool.

Till next time, Happy Railroading…


Road Trip…

So every year, about this time, my wife and I take a little road trip. We like to get away for several days (our anniversary and her birthday) and because we travel so much for work, we prefer to drive someplace rather than fly. There’s the usual places within a couple hours drive of the cities, but we’ve done them so many times that in the last several years we’ve been driving farther to visit places we haven’t been to.

This year we sat down to plan the trip and my wife said that she wanted to go to Milwaukee (no, she had no idea) and while she would plan lodging and meals, points of interest were up to me.

So I climbed onto the computer and started googling points of interest in the Milwaukee area (wait for it…) and as I writing down different things (don’t worry, it will occur to him) it suddenly came to me that two of the biggest attraction for a model railroader were in Milwaukee. Yes, Kalmbach Publishing and Walther’s.

I didn’t come right out and tell my wife that these would be the highlights of the trip for me, but I did manage to casually bring them up as we were talking about various sights to see. It’s knowing your audience folks, she was happy to tag along and excited that I could see them.

We left last Monday morning, with the plan being to drive out and get to the hotel late Monday afternoon, have dinner and a relaxing night. Then start the sightseeing on Tuesday. As she thought about it, my wife wanted to visit Walther’s first thing Tuesday morning. And you wonder why I love this woman. So Tuesday morning, with Siri giving us directions, we headed to Walther’s. Unfortunately I missed the part where they weren’t open on Sunday, Monday OR Tuesday. Yes, I was a little bummed, but the funny part was that my wife was absolutely devastated.

From there we headed off to the Milwaukee Art Museum. This would be the top pick for my wife. Don’t get me wrong, I love museums, it’s just that I prefer the old European masters and not so much the more contemporary art that the museum is known for. First of all the museum itself is beautiful, a piece of contemporary art all by itself.

Milwaukee Art Museum.

Yes, those are wings and yes, they open and close. They also “flap” at around noon each day.

Once inside, as I was walking around the Modern section, I did find a couple of pieces that appealed to the railroader in me. First was part of a large wall collage.

Milwaukee Art Museum - part of a full wall collage.
Milwaukee Art Museum – part of a full wall collage.

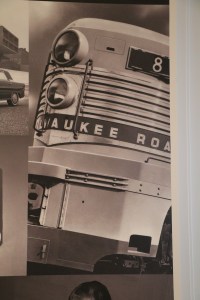
The engine was a Raymond Loewy design for the Milwaukee Road. The guy designed just about everything that screams “Americana” from the twentieth century.

Next was a steam locomotive an artist had made. It’ nice to know that the art world can appreciate the beauty of the steam loco.

Milwaukee Art Museum - Steam locomotive as art, why not.
Milwaukee Art Museum – Steam locomotive as art, why not.

As I had said earlier, my wife had picked out the hotel. We were staying at the “Iron Horse Hotel” just south of downtown. Not sure how they came up with the name, but it is along side a couple of tracks. And some of the interior décor leaned that way.

Iron Horse Hotel - in the display case.
Iron Horse Hotel – in the display case.
Iron Horse Hotel - the locomotives tender.
Iron Horse Hotel – the locomotives tender.

It is a great little boutique hotel, and I would recommend it. Their signature burger is probably one of the best I have had. However, if you plan to stay there in the late spring, summer or early fall be fore warned. It’s a block from the Harley-Davidson museum and a mecca for bikers who they happily cater to. Right down to the approximately 4 dozen bike only parking spaces in front of the hotel.

But as I had said there were a couple of tracks right under our window and I was able to do some railfanning right from the room. Mainly transfer runs from one yard to another. You would always know when one was coming by as there was a grade climbing out of the yard and you could hear the engine working to climb it. And no, they didn’t work through the night. The latest I heard was at about 9:00 pm when a heavy freight pulled by a couple of big GE’s would leave the yard.

A couple of things I learned watching them are: modern tank cars have there reporting marks stenciled along the top and crews can be creative. Saw one CP geep with a 24 bottle flat of water on the short hood outside the windows to keep it cool.

Railfanning from the room.

I will have I post on Walther’s and Kalmbach in the next day or so, as I have a ton of pictures to go through before I write anything.

Just wanted you to know why I hadn’t gotten anything done downstairs this week.

Till next time, Happy Railroading…


Twin City Model Railroad Museum pt. 2…
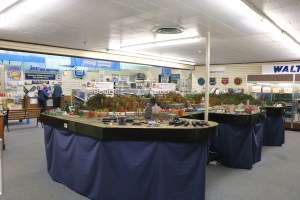
This is an update to my Twin City Model Railroad Museum post from last October. As I had talked about in the post, the Twin City Model Railroad Museum had to vacate it’s space in Bandana Square because of a financial situation with the landlord. At that time they weren’t sure if they had anywhere to go or if they would simply cease to exist after 81 years.

Good News, the museum group has secured a new home and are already planning their move. Their new home is at: 652 Transfer Road in St. Paul, near what was the former Amtrack Station ( Amtrack has moved to the restored St. Paul Union Depot, where the club was originally located). They are already planning their move starting in March, with what they hope will be a grand opening in late spring. Pretty grand plans considering the size of the layout they have to move. And yes, I plan on being there when they open.

When the public heard of their situation, there was an outpouring of support for the club and they were able to raise $70,000 to help in securing the new location and finance the move. If you would like to help (and no, I am not affiliated with the group in anyway), you can check out their web site @ Twin city Model Railroad Museum ( tcmrm.org). I am sure they would appreciate the support.

As I had said, I was sad that I would not be able to share this with my grandson. I am happy that now I will, but I am happier that others will be able to experience a great model railroad and perhaps become involved in the hobby as well.

A Great Day, Happy Railroading…