
No new construction on the layout to report and it’s been awhile since I posted. I have been finishing up other projects around the house and should be able to get back in the basement soon.
I took this time to finish up a several structures for the layout in my spare time and thought I would again work on my close-up photography. I was shooting with my Cannon XTi with a 50mm macro lens with a light ring mounted on the lens for filler light. I apologize as I’m still working on depth of field.


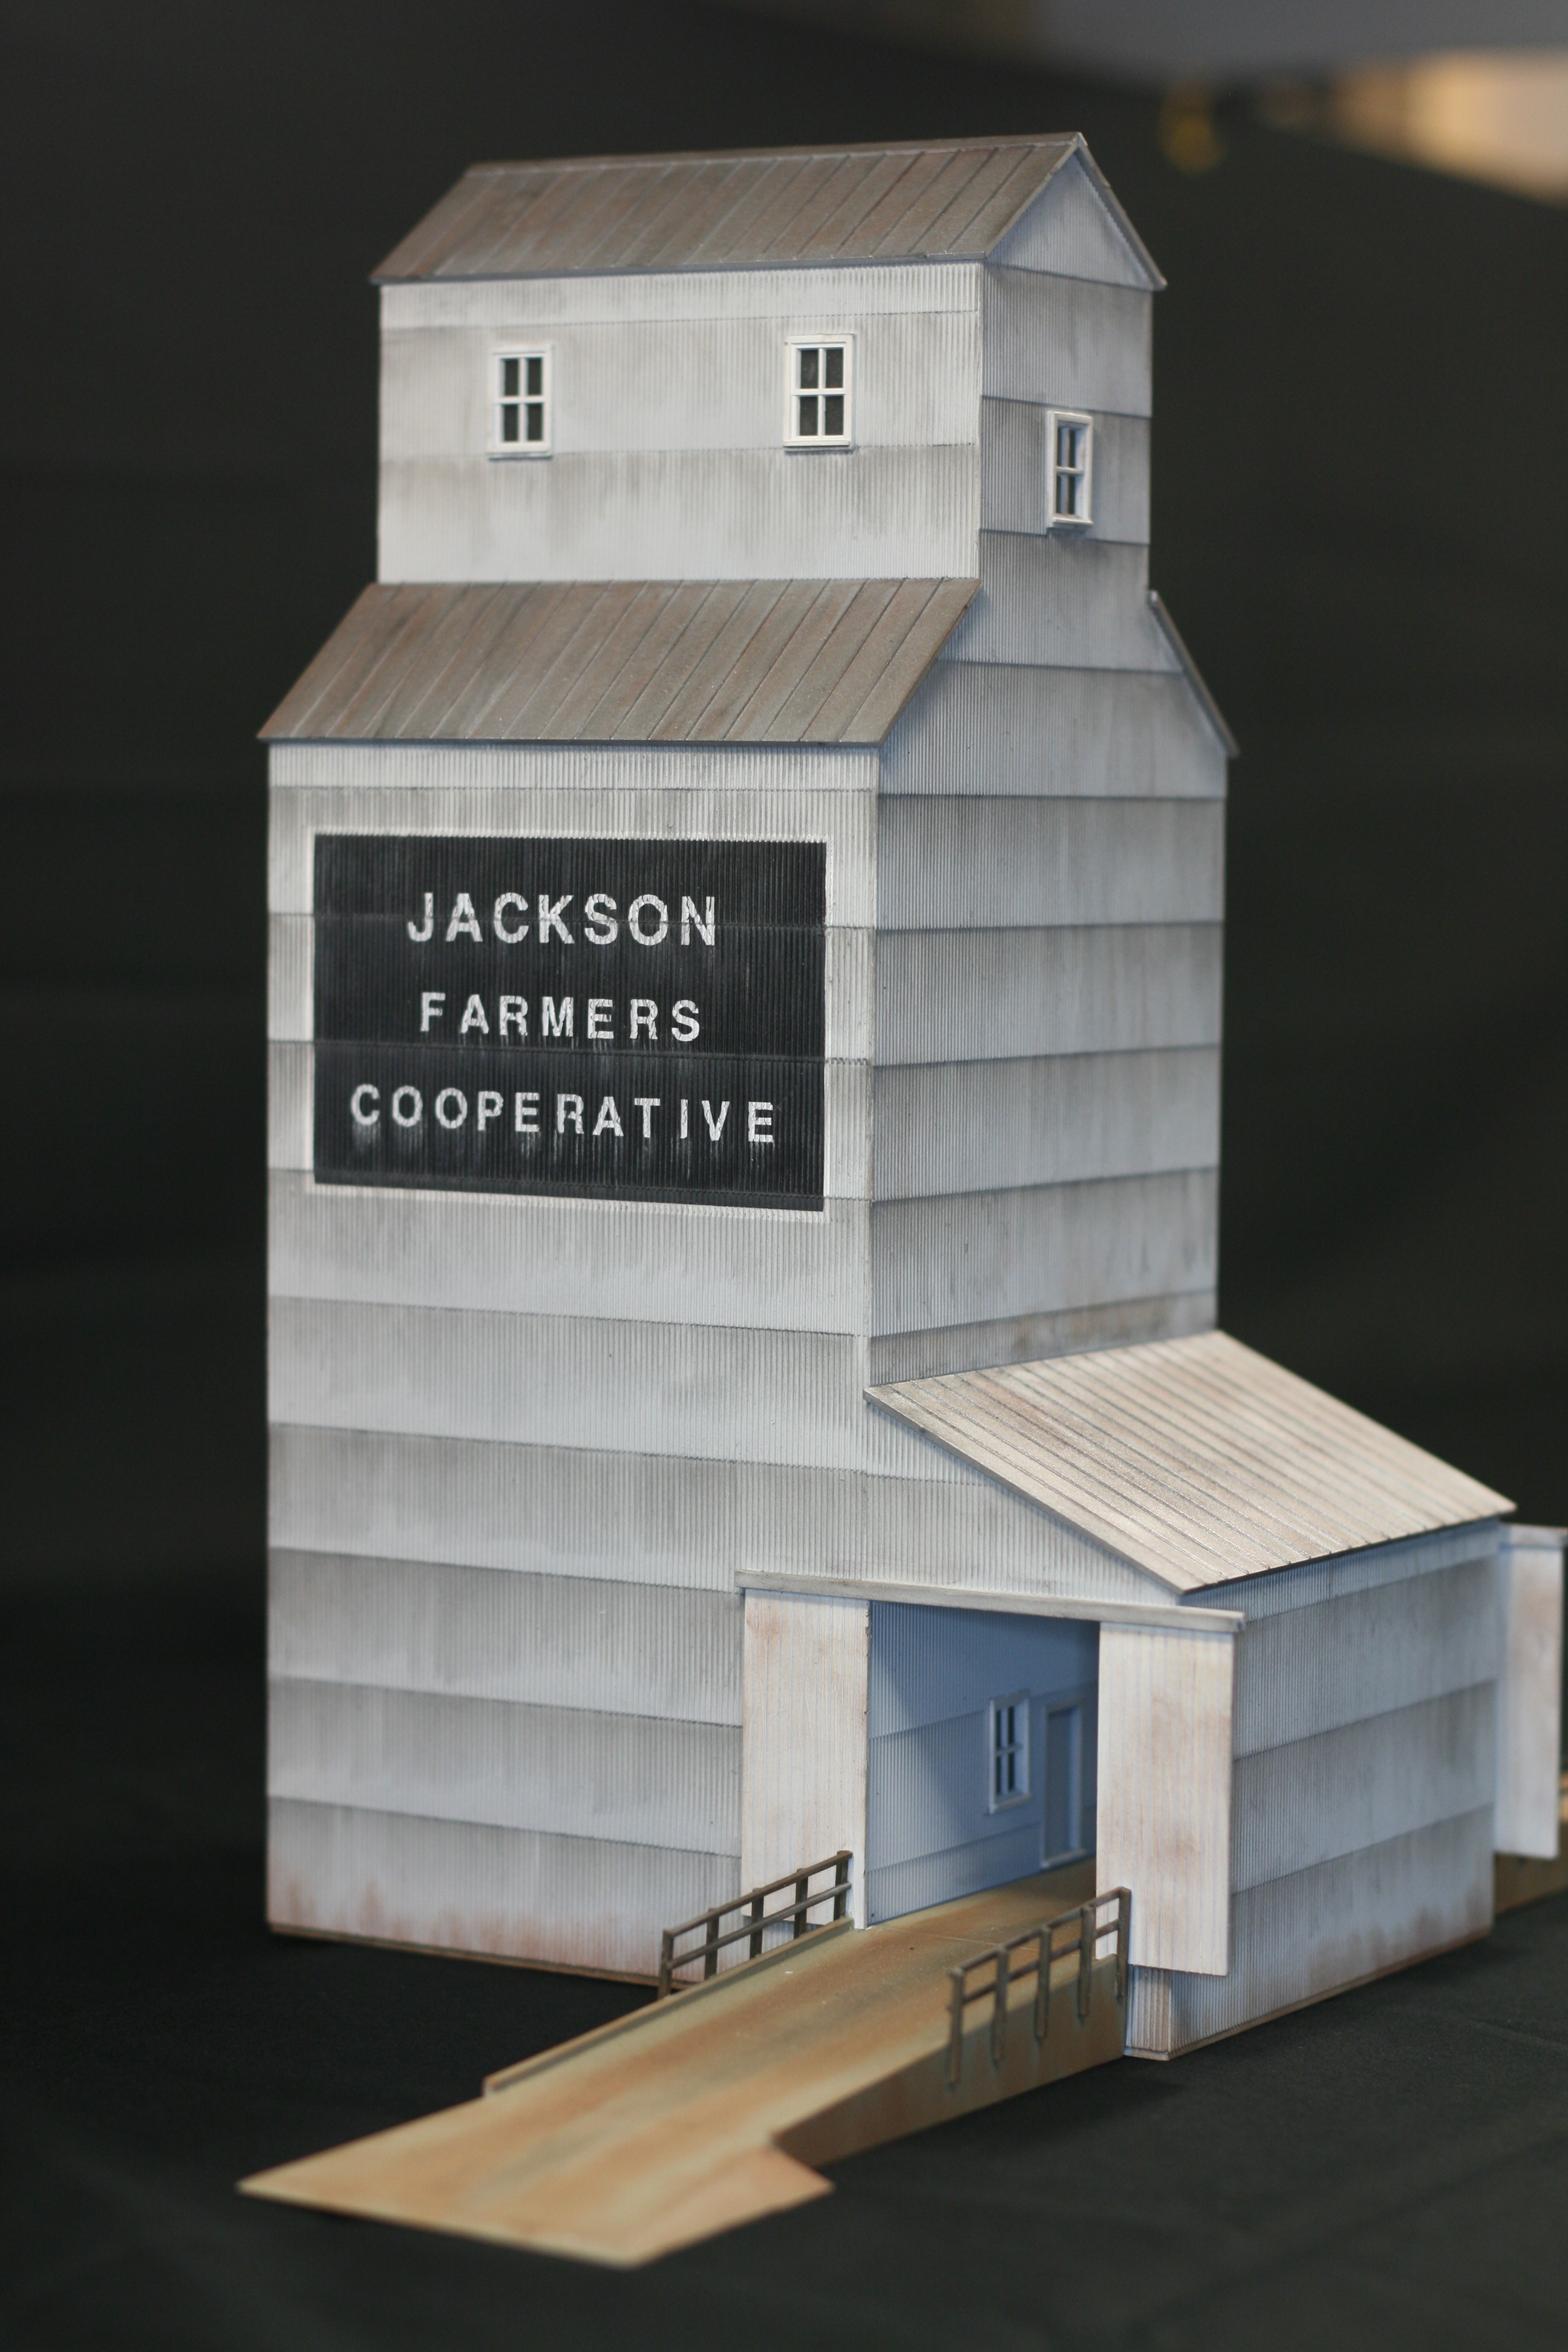
First up is the grain elevator for the town of Jackson, Minnesota. It is a Walther’s kit that I assembled with no modifications. It is the first time that I have used Pan Pastels for weathering. In the past I usually used weathering chalks for the main weathering. The Pan Pastels took a little more to get used to for weathing then chalks. With the chalk weathering you can gradually work up to what you want, with the Pan Pastels it goes on a little heavier. Thus care has to be used so as not to over do it. I am happy with the results and look forward to using them in the future.


Next up is the pier terminal. I have shown this before in a previous post but wanted to talk a little about it. What I quickly discovered with the upper deck is that everything is at eye level ( duh ) and thus interiors are going to be very important for this level. I Had to build a complete interior for the warehouse portion. This included all the buildings support structure, lighting and upstairs offices. The office in the upper corner is complete with desks, paperwork, a dock supervisor and secretary. It is also lit. I weathered this building with chalks.

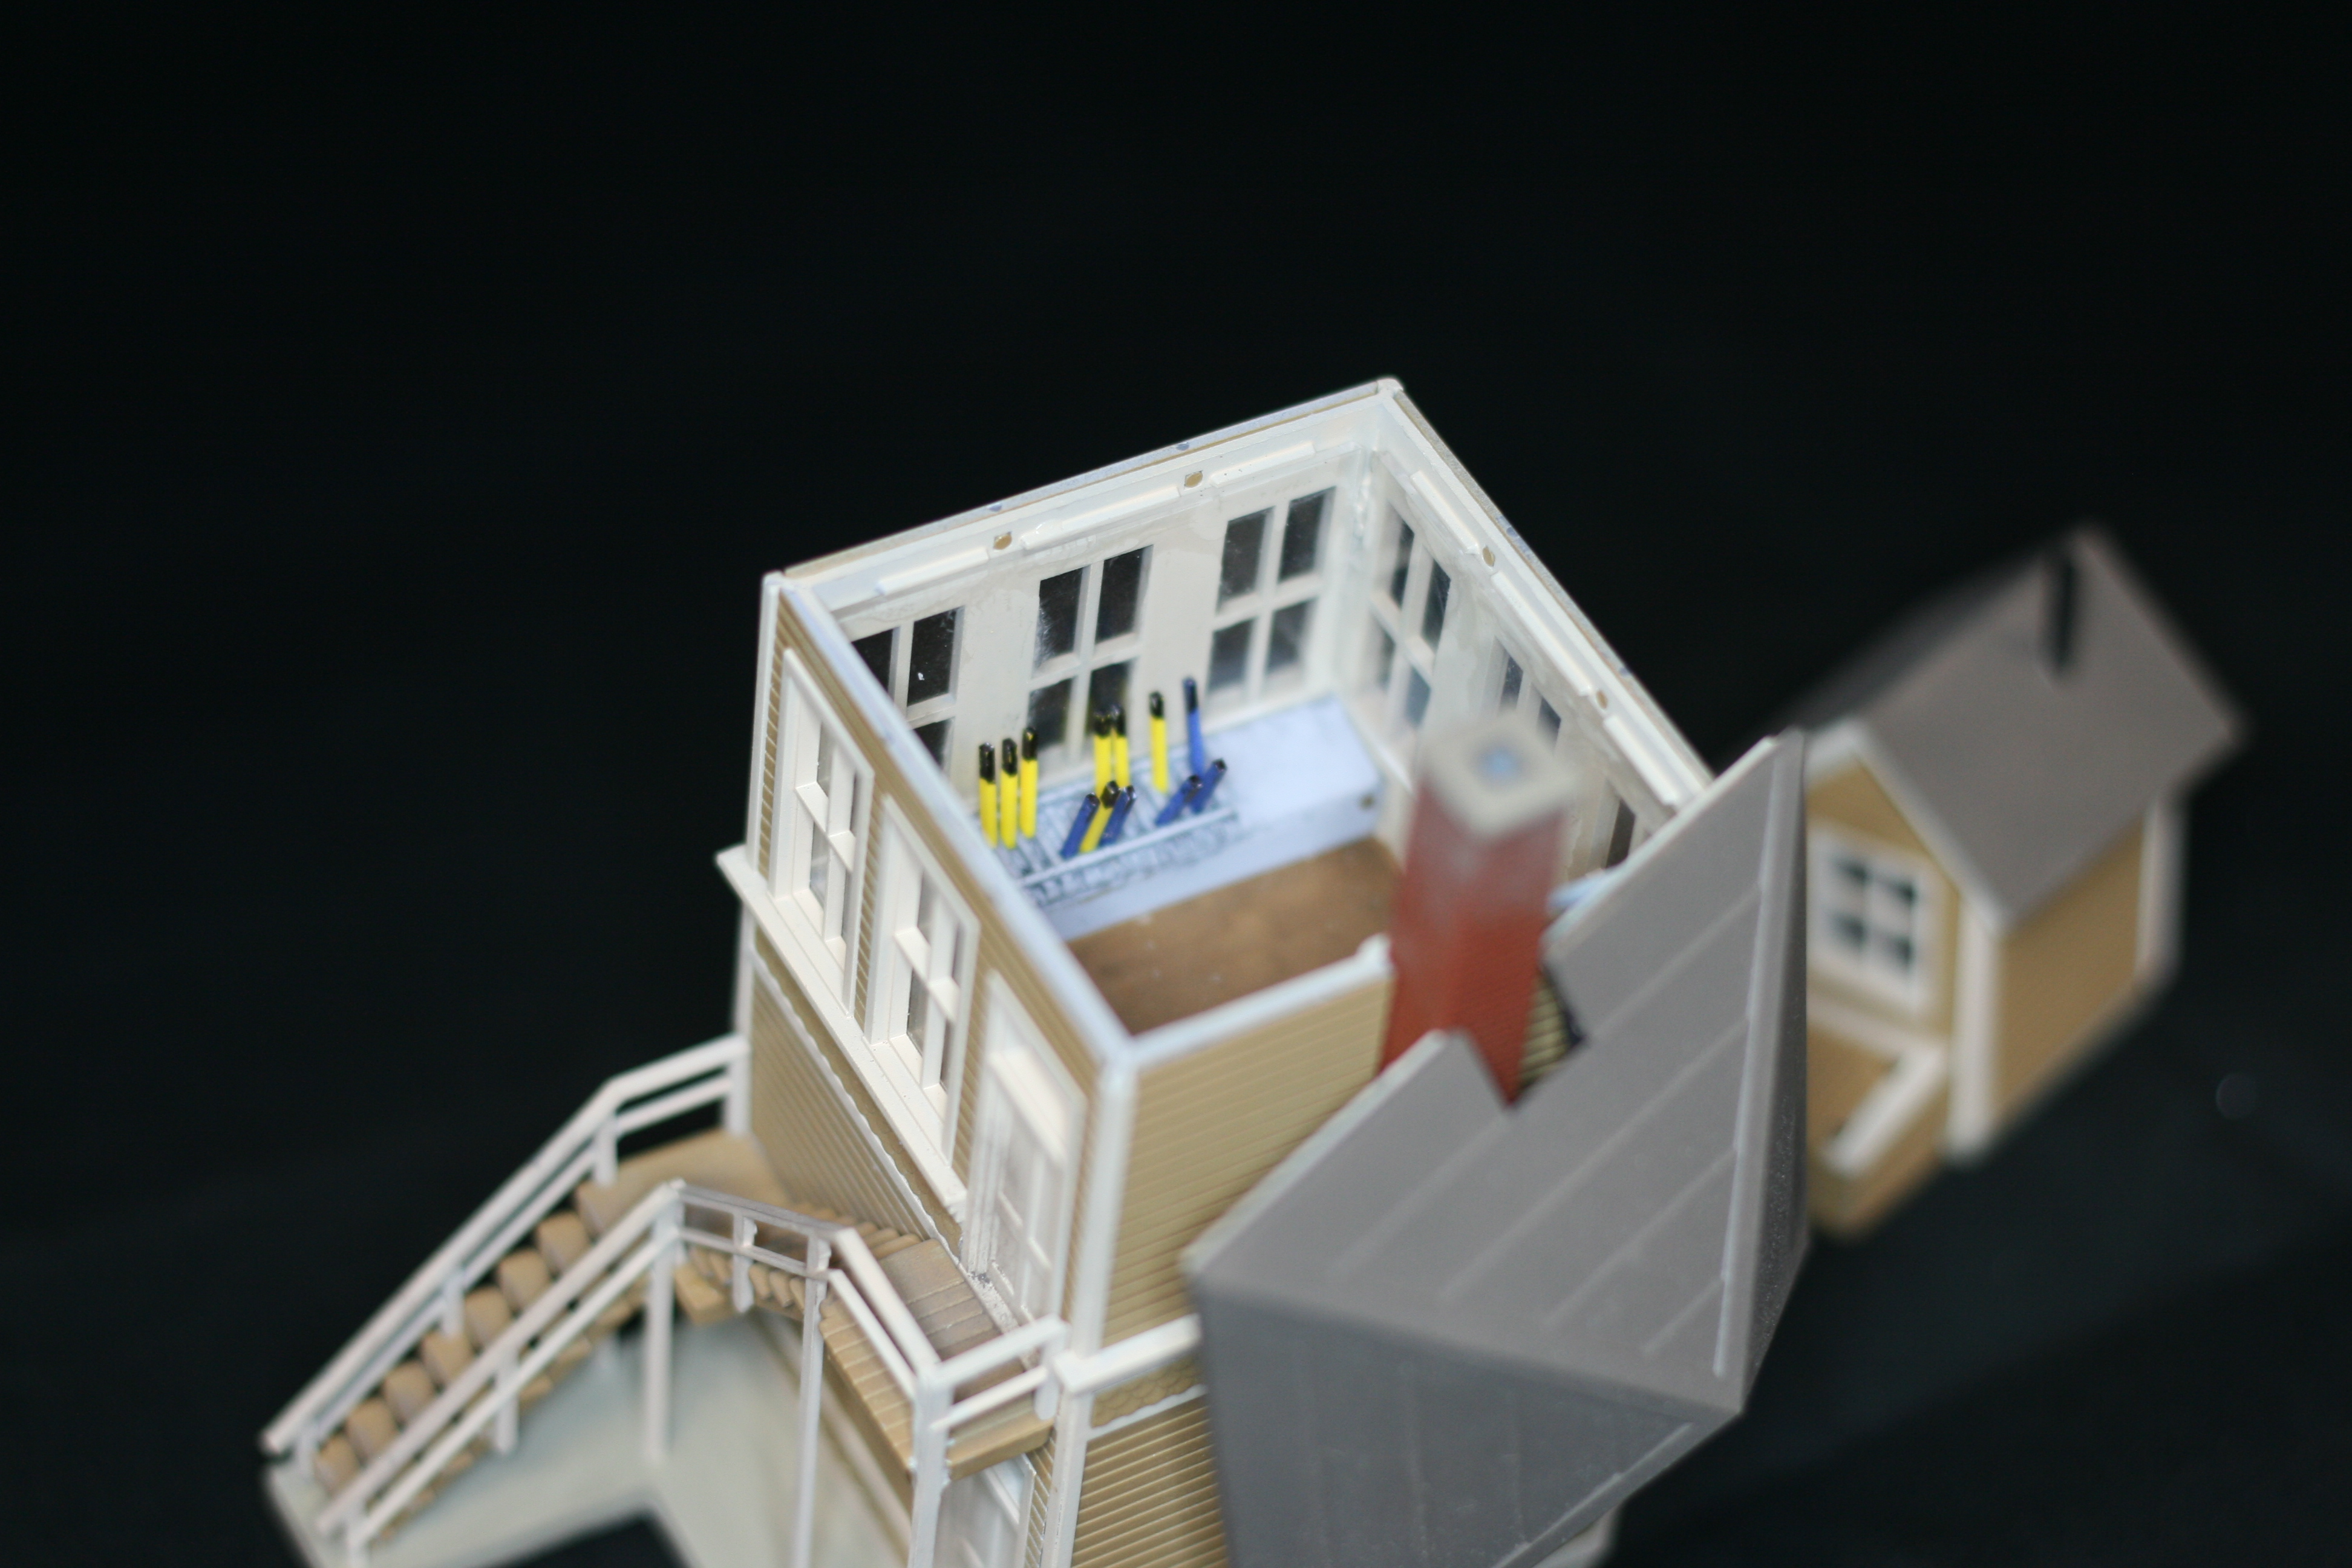

Next is the switch tower. Again it will be on the upper level and thus needed an interior. Since I was only lighting the upper floor that’s where I concentrated the detail. I added the switch levers and a desk area. For now I lightly weathered the building.

Last for now is the standard small town depot. Not much to say about it. Straight out of the box build. I will be replacing the train order boards with working ones from Tomar.