Since I’m unable to continue on the bench work due to the “car in the garage” , I thought that I would start laying track since I had already put down the plywood sub roadbed. No great revelations here folks, I’m pretty much old school when it comes to laying track. The roadbed is Midwest cork roadbed, nailed down. The track is then spiked to the roadbed, after the ballast is glued down I go back and pull the spikes on the track so the heads don’t show. This has worked very well for me in the past as when I tore down the old layout I was able to save about 90% of the track and switches by simply soaking the track with water and use a putty knife to lift it up.
I started with the staging yard as this really doesn’t take much planning if you know the length of it.

I drew the centerlines for the yard tracks and then laid the switches in place and marked their location. I began laying the cork from the switch locations and moved down the yard tracks. I like putting down the cork and laying track, for me it is relaxing and rewarding. It also tends to move very fast and I had the yard done in a relatively short time.


Again starting with the turnouts I put down the track.


I used the boxcar and the two passenger cars to check the trackwork as I progressed down the yard. By lightly putting your hand on the car and rolling down the track you can feel irregularities in the track and correct the problem. The same with the passenger cars, plus check the switch points as these will tend to pick the switch points if there is a problem.

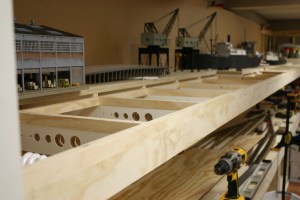
I then moved to the upper deck, but first had to correct a problem with the level of the harbor. You know that old saying ” measure twice and cut once “, yeah, well I measured and did the math several times and it was still wrong. I cut spacers and raised the level and then moved on to figure out track location.


I had basically two industries planned for this leg of the benchwork, the Hullett unloader and the warehouse / dock scene. So it was just a matter of setting those to things in place and planning the track work from there. Not being a great railroad planner what I did was lay out the tracks that were necessary, the tracks for loading bay and under the unloader, and then adding the track and switches that made them work. I rearranged things several times until I had a layout that made sense, mentally doing switching moves and such. I may have to change 1 or 2 things after I power the section and can actually use the area, but I think it all makes sense.


