End of January Update…

It is the and of January and I have some actual progress to report on the railroad. First of all, for those wondering about the roundhouse, progress on it is as far as it can go until it is set in place. And when that will happen is a whole post on it’s own.

So what have I gotten done. Well, as I mentioned at the beginning of the month, I had cut a whole bunch of wood so that things could get done. First the “power box” that I touched on in that post.

I have been reading in multiple blogs and forums that one should be able to kill the power to the whole railroad should something happen. Add to that all the extension cords and power strips I had everything hooked up to, I figured I should do something. My answer was a box that would control power to the deck lights, aisle lights, blue rope lights for night lighting and all the power to the DCC system and related equipment.

It is simply a box tucked into the one of the electronic cabinets that has power to it, with switches on the front for the different functions and outlets on the back for the related items. Here is a photo of the finished box in place.

Main power panel – light control as well as all power to the layout.

It wasn’t hard to do, just a little time consuming, but I already feel it has been worth it as I used to have to plug in two cords to get the deck lights on in order to work on things on the lower deck. Now, I just flip a switch.

Next was the missing backdrop sections. Those installed were: The short section near the power station between the staging yard and the power station, behind the roundhouse and behind the berm scene.

Scenic block between layout and staging yard.
View from the staging yard.
Backdrop behind the roundhouse scene.
Backdrop in place behind New Brighton berm scene.

I have one section left on the lower level which is on the backside of the berm scene. I have the piece cut but have not installed it yet. The gaping hole between the piece behind the roundhouse and the berm scene is where the helix will be. Its backdrop won’t be installed until it’s installed.

The next thing I have been working on has been the fascia around the lower level. I had started with the piece under the staging yard and have been working my way around. I have it in place all the way up to the town of Jackson. However, I stopped just outside of town as I’m trying to figure out some of the scenery contours and need to figure out how wide to cut the next piece to accommodate a hill that acts as a scenic block.

Fascia in place in the back aisle. Holes cut for UP5 panels.
Fascia installation working it’s way around layout.

I also have mounting the UP5 panels for the DCC system to the fascia. I made a mounting template out of styrene to mark screw hole location and the hole for the circuit board. Fun to make and it makes it easier to mark the holes and keeps things consistent.

UP5 template I made to speed up the hole process.
Hole cut for the UP5 panel.
UP5 panel mounted.

Lastly, the first set of doors are done and installed. These are on the side that faces the stairway up to the family room. Since there is no door that would block the view of the unfinished layout, it has been my wife’s biggest bug-a-boo and why she wanted them in.

First set of cabinet doors finished and installed.
View of the layout from the family room. This is why my wife wanted the doors on.

As I said this is the first set, only 25 more doors to make. But the heat is off to get them done.

So looking back at January what have I learned. Probably the same thing you had noticed, that after several months of not being able to work on anything major downstairs, I was all over the board trying to get everything done. Time to sit back and take stock of where I’m at and organize where I’m heading.

Till next, Happy Railroading…


Twin City Model Railroad Museum Pt.3…

A year ago I wrote that the Twin City Model Railroad Museum had found new space and was raising money in preparation for a move. Over the New Years weekend my wife and I stopped by their new space to see how they were doing.

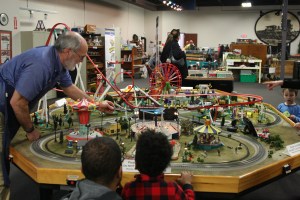
I’m happy to report that they have successfully completed their move. In fact, they not only have managed to move their old layout and have it up and running, they also have added about a half dozen other smaller layouts for display and for children to interact with.

In addition, they have several display cases showing different scales or a variety of type of trains. Also, they have display boards explaining scale, types of trains and what the plan is for the space.

As far as the space goes, right now it’s one big space with a hodge-podge  of layouts and displays. They did have a floor plan of what the finished plan is, I didn’t get a picture of this, and some conceptual art of the space –

Concept art of what the future holds for the museum.

There will be a real railroad feel to the space, with false walls dividing the different areas. Another thing I didn’t take a picture of was an elevated space for the operators of the main O Gauge layout. When finished, it will look like a switch tower.

Here are 3 pictures of what greets you now when you walk in:

Part 1 of three shot pan of the new space.
Part 2
And, part 3

Some of the display layouts:

Marklin layout on display. Has buttons (to the far right in the photo) so that kids can make the trains go.
One of several small display layouts on hand.

Some of the display layouts were supplied by other local clubs.

They also have a large children’s area with interactive layouts. Some being hands on and some have push and hold buttons to make the trains go and other things to move. And of course as you will see in one picture, if you have small children, you’re going to have to rerail things.

View of the kids area.
Another of the interactive layouts aimed at kids,

And the afore mentioned display cases / boards –

Another of the multiple display cases on hand.
A Hornby display case.

They still have along ways to go to get where they want to be. The main layout alone, though up and running, has no backdrop and big holes and gaps in the scenery where it was taken apart and put back together. Add to that all the walls and railroady structures they want to add ambiance, and you know they have some work ahead of them.

Having said all that, it’s still worth a stop by if you are in the area. Their new address is:

Twin City Model Railroad Museum, 668 Transfer Road #8, St. Paul MN.

New entrance to the Twin City Model Railroad Museum @ 668 Transfer Road #8, St. Paul, MN.

Stay tuned, I will have an update of what I’ve gotten done in the last month very soon. Till then, Happy Railroading…


Happy New Year…

Happy New Year to you all. And Merry Christmas and Happy Thanksgiving as well, as I seem to have missed them all.

Looking back at my last series of posts (On the workbench) I was pretty confident that I would soon have time to do some major work on the layout. In fact in the first of the series I had said that I had a cut list and timing for getting the major projects going.

Unfortunately that all fell apart. First was work (and no, I won’t apologize for this as I have to keep a roof over the layout), the last quarter was hell with two trips suddenly tucked in between Thanksgiving and Christmas. My wife and I also host Thanksgiving, Christmas and this year New Years for family and friends, 20+ per holiday. And then the thing that totally shot any hope of getting anything done was a simple little thing off from my wife’s “Honey do list”.

She had originally asked if we could repaint the office as the color was left over from when my daughter had the room as her bedroom before moving out. I agreed as the color kind of sucked. The easiest way to tackle this was to move most of the stuff out of the office as we had desks, bookcases and other things tucked against the walls.

As I was laying out the plan to move things out so that I could gain access to the walls to paint them, my wife’s eye kind of glazed over as her mind went to work. Yes, I knew I was in trouble.

She felt that since we were moving most of the furniture out then why not move everything out. That way we could replace the carpet with a nice laminate wood flooring. And since we did that then she had some pictures of built in desks and shelving. If you give a mouse a cookie.

So her desk went down to the sunroom off from the dining room and mine went to the only other area that had any space… the basement. After I tucked a desk into the only open area large enough, which was at the end of the peninsula, getting anything downstairs was impossible.

Oh, and I had to have it complete enough to get things moved back in by Thanksgiving.

Tough schedule, but I felt I was up to the challenge. Everything was moving along well. Repaint ceiling and walls, check. Install floor, slight delay as Home Depot didn’t have enough in stock, but got it in, check. Start construction of built in desks and shelves, well this is where God decided to show he has a sense of humor.

My two least  favorite home projects are plumbing and taping and sanding sheetrock. As I was making pretty good progress on the desk part, a leak developed in the upstairs bathroom which came through the ceiling in the downstairs bathroom. I had to tear out a large part of the ceiling downstairs to gain access to the upstairs. It took me a couple of days to isolate the leak and repair it, which still left me with a large hole downstairs.

My wife decided that the office was more important and that’s was where I concentrated my efforts. I got most everything done in the office (except the cabinet doors) and moved everything back in the night before Thanksgiving. Then, between Thanksgiving and Christmas (and the business trips) I finished the doors and replaced the ceiling downstairs.

So, that’s why absolutely no progress to report, kind of. When buying wood for the office project I also picked up enough to get some stuff done downstairs. Before cleaning up out in the garage I cut a bunch of it up to sizes needed to get projects rolling downstairs.

They are as follows:

1/8 hardboard for the rest of the backdrops on the lower level and for the fascia on the lower level.

Wood for the power switch box ( will explain later)

Plywood for the upper valance supports.

And wood cut to size for the rails and stiles for the cabinet doors.

So I should have some progress to report soon, Till then, here is a picture of the finished office.

The new office.

Till later, and it shouldn’t be long, Happy New Years to all and Happy Railroading…

On The Workbench #4…

For this edition of on the workbench I will continue with the roundhouse as that’s all that I have had time to do. I won’t have time to do major construction on the layout for about another two weeks.

Last I left you I had a list of things yet to do. I have been slowly working my way down that list. First I got the service pits in and painted, as well as the windows and service door at the end, the large doors won’t be installed till the roundhouse is put in place.

Roundhouse with service pits in place.

Then the tracks went into place.

With the tracks in place.

Looking at the pictures I guess I did the doors and windows after these pictures. Then came the weathering. I do enjoy this and slowly worked my way up to where I’m happy with it, working stall to stall. The staining on the floor represents dirt, oil and rust stains.

With the weathering done.
Weathering on the shop floor.

Next was the lighting, but first I added the details to the interior. Tool boxes, oil barrels with lubricating grease, jacks, acetylene tanks, etc. Figures to be added as I figure out there placement.

In the past when I have added lighting to past roundhouses, I had a pair of buss wires for each row of lights. This time I ran one buss and then ran all the wires to it. I also ran the wires from the lights on the backside of the beams as viewed from the cutout opening. I then painted all the wires including the buss wires a flat white so that they would blend into the ceiling.

Adding the lighting.
Alternate view of wiring in progress
Lights wired up and the wire painted to make it disappear.
Overview of the roundhouse lighted, weathered and detailed.

And the finished product with the overhead lighting off and with the roof panels set in place ( which i have repainted a flat black).

Better view with the overhead lights off.
Lighted and the roof in place.

While adding details to the interior, I came across an electric hoist on a beam in the junk box. I decided to add it to the interior. It would not be large enough to handle an entire engine , as some facilities would have, but rather larger items (such as the compressors as pictured). I staged a couple of shots to show work in process just for fun.

Added a hoist for heavy work. Had to stage a scene to get a feel for the finished roundhouse.
Another staged scene for the fun of it. Haven't had a chance to reletter this engine.
Another staged scene for the fun of it. Haven’t had a chance to reletter this engine.

So what’s left to do, well:

Place more workers in the roundhouse.

Install roof sections.

Prep it’s final resting place. Which means getting the turntable installed

That’s where I’m at for now. Till later – Happy Railroading…


On the Workbench #3…

For this installment of On the Workbench I will be showing the progress on the roundhouse. However, first an apology.

It’s been a month and a half since my last post and at the end of it I had hoped you had a good summer and that you would have a great Fall. Well here we are, well into Fall and I’ve been silent. For that I’m sorry. For work we have a large trade show in New York in early October. So for a couple of weeks before hand is very busy. Then there are two weeks in New York and the last week has been all the follow up work.

That’s not to say that I haven’t gotten anything done, just no time to share it. When I left you last I had the basic structure done and it was time to head of to the paint booth.

Before I share that odyssey, one thing that I did and forgot to point out was the smokestacks on the roof. With the advent of steam engines coming with more features, one being that more are coming with working smoke, I made a minor modification to the roof sections with stacks.

The actual smokestacks with the kit are hollow, so I drilled a hole in the middle of the pad that the stack sections mount to. Now if an engine has working smoke and is parked in the roundhouse, the smoke will actually go out through the smokestack. Waiting to see if it actually works.

Roof section with the hole drilled for the smokestack.

Now painting. I had painted the concrete floor before the walls or support beams were in place. So the first thing I had to do was mask the entire floor. I then shot the whole structure with grey primer. My intention was to the paint the lower portion of the walls with a grey paint because any industrial business does this because that’s where most of the dirt happens. Looking at the primer I felt that it would be a little redundant. So a masked off the lower 4 scale feet of the walls and painted the rest of the interior a flat white. After that I further masked off the window openings and painted the exterior of the building. Unfortunately I did not chronicle the journey, I only have the finished photos.

The interior of the round house painted.
The exterior of the roundhouse with it's coat of paint in place.
The exterior of the roundhouse with it’s coat of paint in place.
Close up of the interior painted with the roof sections in place.
Longer view with the roof sections in place. Better view of the smokestacks.

The last thing that I painted was the roof sections. The underside was painted a flat white, while the exterior side was painted a roof brown. Thought about a flat black which is probably more prototypical for the type of roofing, but I wanted the there to be a visual difference between the roofing and the smokestacks. Epic fail.

Testors owns or owned both Model Masters paint and Polly Scale paint. For those who don’t know, Polly Scale was where you went if you were looking for acrylic paint in railroad colors. One of those being “Roof Brown”. Testors got rid of Polly Scale and merged the colors into their Model Masters line. You would think that they would have used the same formula, however they didn’t. The new “Roof Brown” isn’t anything like their old “Roof Brown”. The color sucks and I will have to repaint in a flat black. Which I should have used in the first place. Oh hindsight.

Anyhow, here are the roof sections in place painted in “Roof Brown”.

View from above with the roof sections in place.

Obviously I had not glued them in place yet, as there is a ton of work to be done on the interior.

Next up:

  1. The service pits.
  2. The rail sections.
  3. Weathering the interior walls and floors.
  4. Adding details and figures.
  5. Adding the light fixtures, of which there will be something like 29 of them.

Of course the windows and doors have to go in too.

So, that’s where I’m at. Till next time, Happy Railroading…

On the Workbench #2…

Still been really busy, so I’ve been working at the workbench on the roundhouse as I have time. When I left you last time I had only three stalls done. One thing I noticed as I read through the last post is that I didn’t really explain why the brick facing on the inside off the walls. As they say a picture is worth a thousand words:

With and without the interior brick facing. Without the facing the interior wouldn't look right no matter how much other detail was inside.
With and without the interior brick facing. Without the facing the interior wouldn’t look right no matter how much other detail was inside.

As you can see without the facing you can see the raised and lowered casting for the details on the outside of the walls. By adding the bracing and facing you can hide all that.

I continued adding stalls.

Basic roundhouse completed up to cutout.

In the above I had finished up to the cutout. I do have the whole basic structure done. This is probably obvious from the fact that the short end wall was pictured above.

While surfing online looking at pictures of roundhouse interiors for ideas, I noticed that the interior roof was very evident in all the pictures. While i have all the support beams in place, something I would have to add is rafters. I decided to add these to the underside of the roof sections rather the gluing them in place on the beams. This would make it way easier to add interior detail and as well as painting and weathering. I used .040 X .100 styrene strips, a little big scale wise, but it looks right when set in place with the support posts/beams. They are set on approximately 2 foot centers.

Adding rafters to the underside of the roof pieces.
Rafters added to about half the roof panels, still a ways too go.

What you see above is what I got done before I ran out of strips. It also represents the total inventory for 2 of the local hobby shops. Luckily I still have two more I can hit and see what they have.

Below is a series of pictures showing what it looks like with the finished pieces set in place.

A hint of what the finished interior structure will look like when done.
A better shot of the underside of the roof panels with the rafters added.
Another shot with the cutaway beams in place.

Since I had time but no supplies, I started masking the floor so I could prime and paint the main part of the structure.

So, that’s where I’m at. As I have time I will continue working on the roundhouse and keeping you up to date with my progress. I hope you’ve had a good summer and will have a great fall.

Till next time, Happy Railroading…


On The Workbench…

Wow, it’s already mid August and the list of projects around the house continues to grow. All of which needs to get done before the snow flies here in Minnesota. The good news is that I’ve put all the wood cutting projects on a calendar so that even if I’m not able to actually to get any actual work done on the benchwork, I’ll have everything ready to go even if the weather turns cold.

So with the free time that I’ve had, I decided to start the roundhouse. Probably jumping the gun, with so many other small projects started. But it sounded the like the most fun.

First thing I did was to glue all the base sections together. After I had them glued together, I scribed in concrete panel lines as I doubt anyone would pore one humongous slab.

blog photos 30 001

I kept the them to around 10ft sections, as this seems to be around what is done in the real world. After I had them all scribed I positioned the base on the layout and marked, then cut out the rounded section that intersects the layout edge. I primed and painted the base in a concrete color.

blog photos 30 005

One of the differences between Walther’s roundhouse and their modern roundhouse is that the interior walls are not detailed. The modern roundhouse has brick detail on the interior walls where as the regular roundhouse does not. Since the interior is very visible I had to add interior brick work to the walls.

blog photos 30 007

Once the end wall was done it was off to the races. I glued the end wall into place and the first inner support beam section. Then I glued the front end wall section (the one that supports the doors) and the transom section into place to set the correct spacing. I then added cross bracing that matches the support beams.

blog photos 30 008

Once I finished those I added the end wall, also with brick facing on it. Then it was on to the next section. and so on and so forth.

blog photos 30 011

You will also notice that I removed a little of the brick work around the windows so that the window casting will sit into place.

One other thing I noticed as I was looking at the pictures is that I will need to A: get the backdrop into place and B: put into place any backdrop buildings behind the roundhouse before it goes into place. Because wow, it would suck to try and place them working over this finished scene.

Well that’s what I’ve been up to. I will continue to update as more progress happens. Stay tuned…


Hello and welcome to August…

Hello and welcome to August, my how summer flies by. Why isn’t it that way with winter? Perhaps if I was involved with the right winter activities it would.

I am almost tempted to say that July was a bust as far as the railroad went. Work ate up a tremendous amount of time as I was out of town for half the month. When I was home, projects that suddenly popped up pretty much ate up the rest of the time. When I was home early in the month I kind of sat downstairs (when I had a chance to get down there) in a funk, not really getting anything done. I think we all have these periods of time.

What kind of turned around the month for me was me sitting in front of my computer, binge watching “Rehab My Railroad” on Model Railroader Video Plus. Yup, all episodes, plus the first one on the outdoor railroad.

Now, I’m a long way from rehabbing my railroad as I would have to have something to rehab. But it made me think more in terms of small projects you can get done in a short time. So with a new mindset and renewed enthusiasm I tackled some more small thing that needed to get done.

First thing up was to  build the quarter round corner fillers. I haven’t talked about these before, but they are filler pieces for the squared inside corners so that the fascia panel flows around the layout. Below is a picture I had posted before that shows the corner before the filler piece and one that shows with the piece in place.

The small stock yards and meat packing plant.
Corner filler piece installed along with track to staging yard.

As you can see in the second photo I also added the second track to the staging yard as I needed the filler to lay the track across.

I also added two more fillers in the dead end aisle that is in the New Brighton area.

Filler pieces in here also.

The plan for this area is a turntable and roundhouse, I know, pretty cliche’. However, I need a turntable to turn the steam locomotives and this is obviously the best place. The problem is that it isn’t big enough for a turntable and a roundhouse. The solution is to place part of the roundhouse in the aisle.

Turntable template in place with lines extended for the roundhouse tracks.
How the roundhouse fits into the scene.

Part of the roundhouse obviously will be cut open which means that I will get to do some great super detailing in the roundhouse. I have done this before, again the picture below is from a previous post.

The roundhouse at night, weathered with a detailed interior.

Because the new roundhouse will be right at the edge I will have to step up the detailing to the next level as compared to the one above. I will post on this as I get around to the build of the roundhouse.

I also got the backdrop installed in the port scene and painted.

Upper level harbor scene backdrop in place.

As well as another backdrop building flat for the scene. The building isn’t finished as I want to paint the building name on it, but I’m not sure yet what to call it.

Another backdrop building flat in place for the harbor scene.

That’s what I have for right now. As far as August goes we’ll see how it goes.


Till then, Happy Railroading…


Happy 4th of July…

Happy 4th of July, and to my Canadian counterparts a belated Happy Canada Day (July 1st).

Looking back I can’t believe that the last time I posted was Memorial Day. The time has flown by with summer under way and work has been absolutely crazy busy. Can’t complain, without the work the rest wouldn’t be possible.

Haven’t really gotten anything done that’s worth a post on it’s own and what did get done is bits and pieces. But here goes…

First up – last I left you I had started on the upper valance and had run out of pocket hole screws. Well, I got more screws but didn’t have any real time. I did get four more supports up, but in order to do that I had to take off the backdrop to lower the horizontal brace before mounting the supports. After they were in place I then had to cut slots in the backdrop. I still have one more section of backdrop that will have to under go this process. Not much, but here it is:

Working on the upper valance.

Second – when I have had a little time I’ve been working on the manufacturing backdrop building. I opened up the dock doors and added a floor. Also installed lights. What’s left, detailing the loading dock, the roof detail and weathering.

Manufacturing building, almost done.

For Father’s Day my wife got me something I wanted, but certainly didn’t need. I am now the proud owner of a MTH DM&IR  2-8-8-4 Yellowstone. To be specific, number 229. I had hoped to post it on Father’s Day but I couldn’t find the picture I have of the actual 229 that’s on display in Two Harbors with my 3 kids sitting on the front of it.

Father's Day gift from my wife.
Father’s Day gift from my wife.

Lastly, I will admit that there was quite a bit of non work time available, but my wife found a way of filling that. With two weeks to go till Father’s day she mentioned that she would like a “picnic” table for the deck that could seat everyone. Not thinking I said it would be quicker to buy one. Yup, got the look. I should have known better. What she meant was an Outdoor Dining Table, with a bench built along the railing side. So I had to design and build the table and bench. I will admit that the end results turned out pretty nice.

As they say, for your consideration:

Where my railroad time went.

The work schedule is only going to pick up till mid August, but I should have time to get some stuff downstairs. I will keep you posted and hopefully before the next holiday.

Enjoy your summer and Happy Railroading…


Happy Memorial day…

I would like to wish everyone a Happy Memorial Day and offer my heartfelt thanks and appreciation to all those who served and especially those who have sacrificed all for our freedom and country.

I have finished and started several things this past week. Pretty good considering the work load right now with my job.

First: I have the track in up to the helix transition. Yup, check that off the list.

Track work in up to the helix transition.

While I was installing it and constantly bumping my head, I realized that a bunch of the “stuff” that I had put off till later should probably get done before I get much farther. First and foremost is the backdrop in this area. That way I can also install the base and track for the gravel company.

And then I figured that if I was going to cut the hardboard for the backdrop here, I might as well cut all the backdrops. Upper level included. Which means first I had to install all of the half inch base boards for the backdrops on the upper level.

So second: I did just that. all of the baseboards installed.

Installed all the base boards for the upper level backdrops.

Then I remembered that before I could install the backdrops on the upper level I would have to get all of the upper level valance supports into place as the backdrops will be notched around these.

So… third: I started to install the valance supports.

Started the upper valance supports.

I have all of these cut, the problem was that I only had enough pocket hole screws to get just this corner in place. Late on Memorial Day is not the time that you are going to be able to run out and buy more.

This whole episode is very much like the story – If you give a mouse a cookie.

A couple of other things that I have been working on. First is a background building for Jackson. It started out life as a Walther’s Water Street Freight Terminal. I am making it into a light manufacturing building. Because the space is only 4 1/4 inches deep here, I had to narrow the depth. I used the backside of the main building that I cut off to lengthen the building. Right now I’m working on the mortar lines in the brick. After that I’ll add the windows and such. To make it look more like a manufacturing plant than a warehouse, I’ll add venting ducts, piping and perhaps some tanks to the outside.

Here’s what I started with:

The basis for my light industry for the Jackson background.

And here’s where I’m at so far:

Modified the kit as a background building.
From the other end.
From the other end.
Overall building.
Overall building.

One last thing, I installed a concrete retaining wall behind the buildings along the berm in New Brighton. I was out of the mix of paint that I use for old concrete and used Floquil “aged concrete” paint that I had on hand. The color looks nothing like old concrete. So I bought some paint and mixed my color and started to repaint it. Below is a picture of the wall and the two colors as well as a couple of what the scene will look like when finished.

Concrete retaining wall along the berm scene
View down main street in New Brighton.
From the other angle.

That’s it for this week, till next time – Happy Railroading…


Michael Bromander's Personal Website