Givens and Druthers

“Givens and Druthers” is the excepted term for what we want and what we would like on are model railroads. It seems a bit formal to me and I prefer to think of it as what I know and what I would like.

What I know: My railroad is set in 1954. It originally started out in 1953, but I picked up a couple of Classic Metal Works automobiles of 1954 vintage and the year jumped ahead. The railroad is double tracked. I like the looks of a double tracked railroad, possibly because during my youth we took many trips up north to visit relatives. The route was HWY 10 in Minnesota following what would be the Burlington Northerns double track main line. Also because of space constraints the length of the sidings would leave short single track portions, at which point it might as well be double tracked.

The layout will have 30″ minimum radius curves. 36″ minimum aisle width, with most being 42″ or greater. It will be double decked. I have finished the layout room with sheet rocked walls, a suspended ceiling, with plenty of overhead lighting. Also a finished floor. This is because the last layout was dark and cramped, very uninviting.

Most of the road power will be steam. The thought being that while the railroad is converting to diesel power, and what road wasn’t at this time, because of the length of the division steam was still a viable source of power. Diesel power will be making inroads even in this division but will not be prominent.

I will be using a Digitrax DCC power system for the layout. Which leads to the things I want:

I plan on powering all turnouts with Tortoise switch machines. They are a must on the upper level as it would be difficult to reach into the scene because of the height and I don’t want push/pull knobs on the fascia. They will be controlled by Digitrax DS 64 stationary controllers. A track diagram will be on the fascia with switch numbers and a bi-color LED to indicate the switch position.

There will be a signal system on the mainline. I will be using the Atlas signal system, and while I know that the type G signals were not that common, the system is pretty straight forward in installation. I will be using the NCE DB-20 for track detection.

While in the city sections there are no at grade crossings, as you move into the countryside the larger towns will have lighted crossing signals. The smaller towns will have only the standard crossbucks.

Scenery will consist of rural farming communities outside of the cities with predominately deciduous trees on the lower deck. The upper deck is set in more northern Minnesota with again rural settings with more evergreen type trees and rock outcroppings which is typical of this area.

That’s kind of it for right now. I have had all these thoughts rolling around in my head but have never written them down. I suppose it’s good that I am finally writing them down as it will make things easier going forward. As I think of more I will update the blog as to what they are.


Layout structures and Photography

No new construction on the layout to report and it’s been awhile since I posted. I have been finishing up other projects around the house and should be able to get back in the basement soon.

I took this time to finish up a several structures for the layout in my spare time and thought I would again work on my close-up photography. I was shooting with my Cannon XTi with a 50mm macro lens with a light ring mounted on the lens for filler light. I apologize as I’m still working on depth of field.


Walther's grain elevator - weathered and ready for the layout
Walther’s grain elevator – weathered and ready for the layout
Walther's grain elevator - truck unloading ramp
Walther’s grain elevator – truck unloading ramp
Walther's grain elevator - backside
Walther’s grain elevator – backside
From the opposite angle

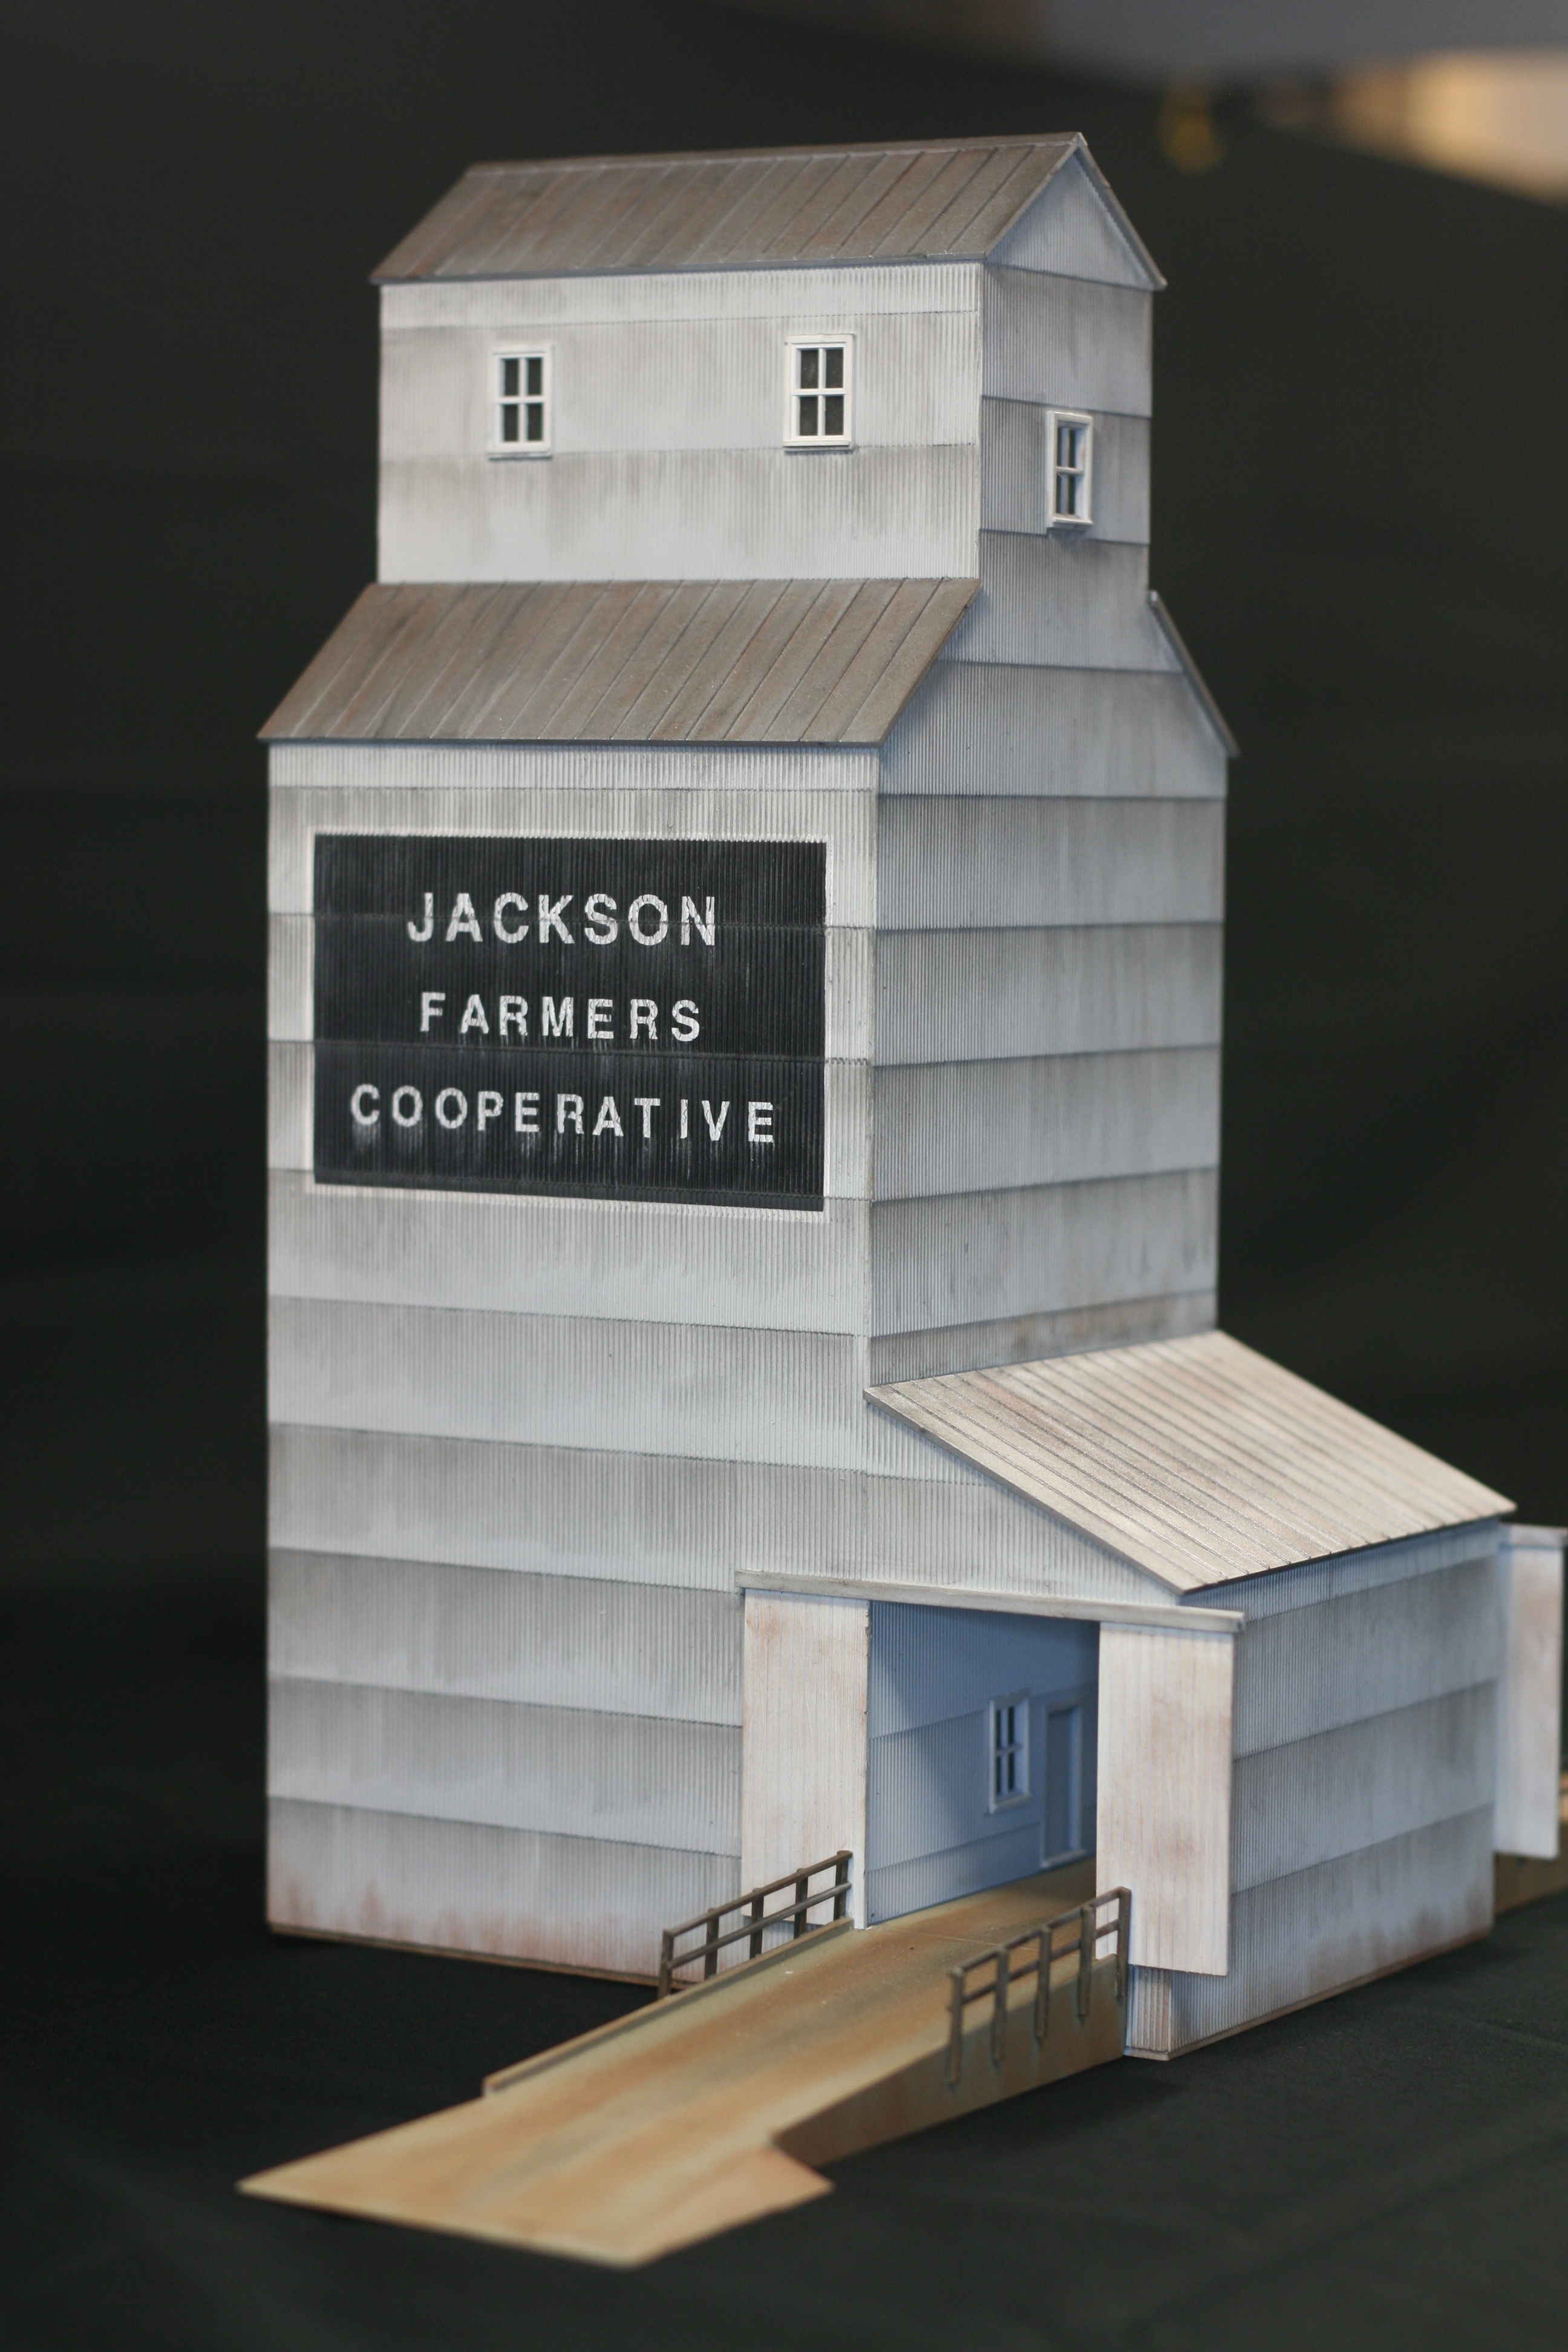
First up is the grain elevator for the town of Jackson, Minnesota. It is a Walther’s kit that I assembled with no modifications. It is the first time that I have used Pan Pastels for weathering. In the past I usually used weathering chalks for the main weathering. The Pan Pastels took a little more to get used to for weathing then chalks. With the chalk weathering you can gradually work up to what you want, with the Pan Pastels it goes on a little heavier. Thus care has to be used so as not to over do it. I am happy with the results and look forward to using them in the future.

Walther's Municipal terminal - with finished interior and lighting
Walther’s Municipal terminal – with finished interior and lighting
Close-up of interior and lighting

Next up is the pier terminal. I have shown this before in a previous post but wanted to talk a little about it. What I quickly discovered with the upper deck is that everything is at eye level ( duh ) and thus interiors are going to be very important for this level. I Had to build a complete interior for the warehouse portion. This included all the buildings support structure, lighting and upstairs offices. The office in the upper corner is complete with desks, paperwork, a dock supervisor and secretary. It is also lit. I weathered this building with chalks.

Switch tower - added upstairs interior and lighting
Switch tower – added upstairs interior and lighting

layout structures 022

Another angle showing desk area

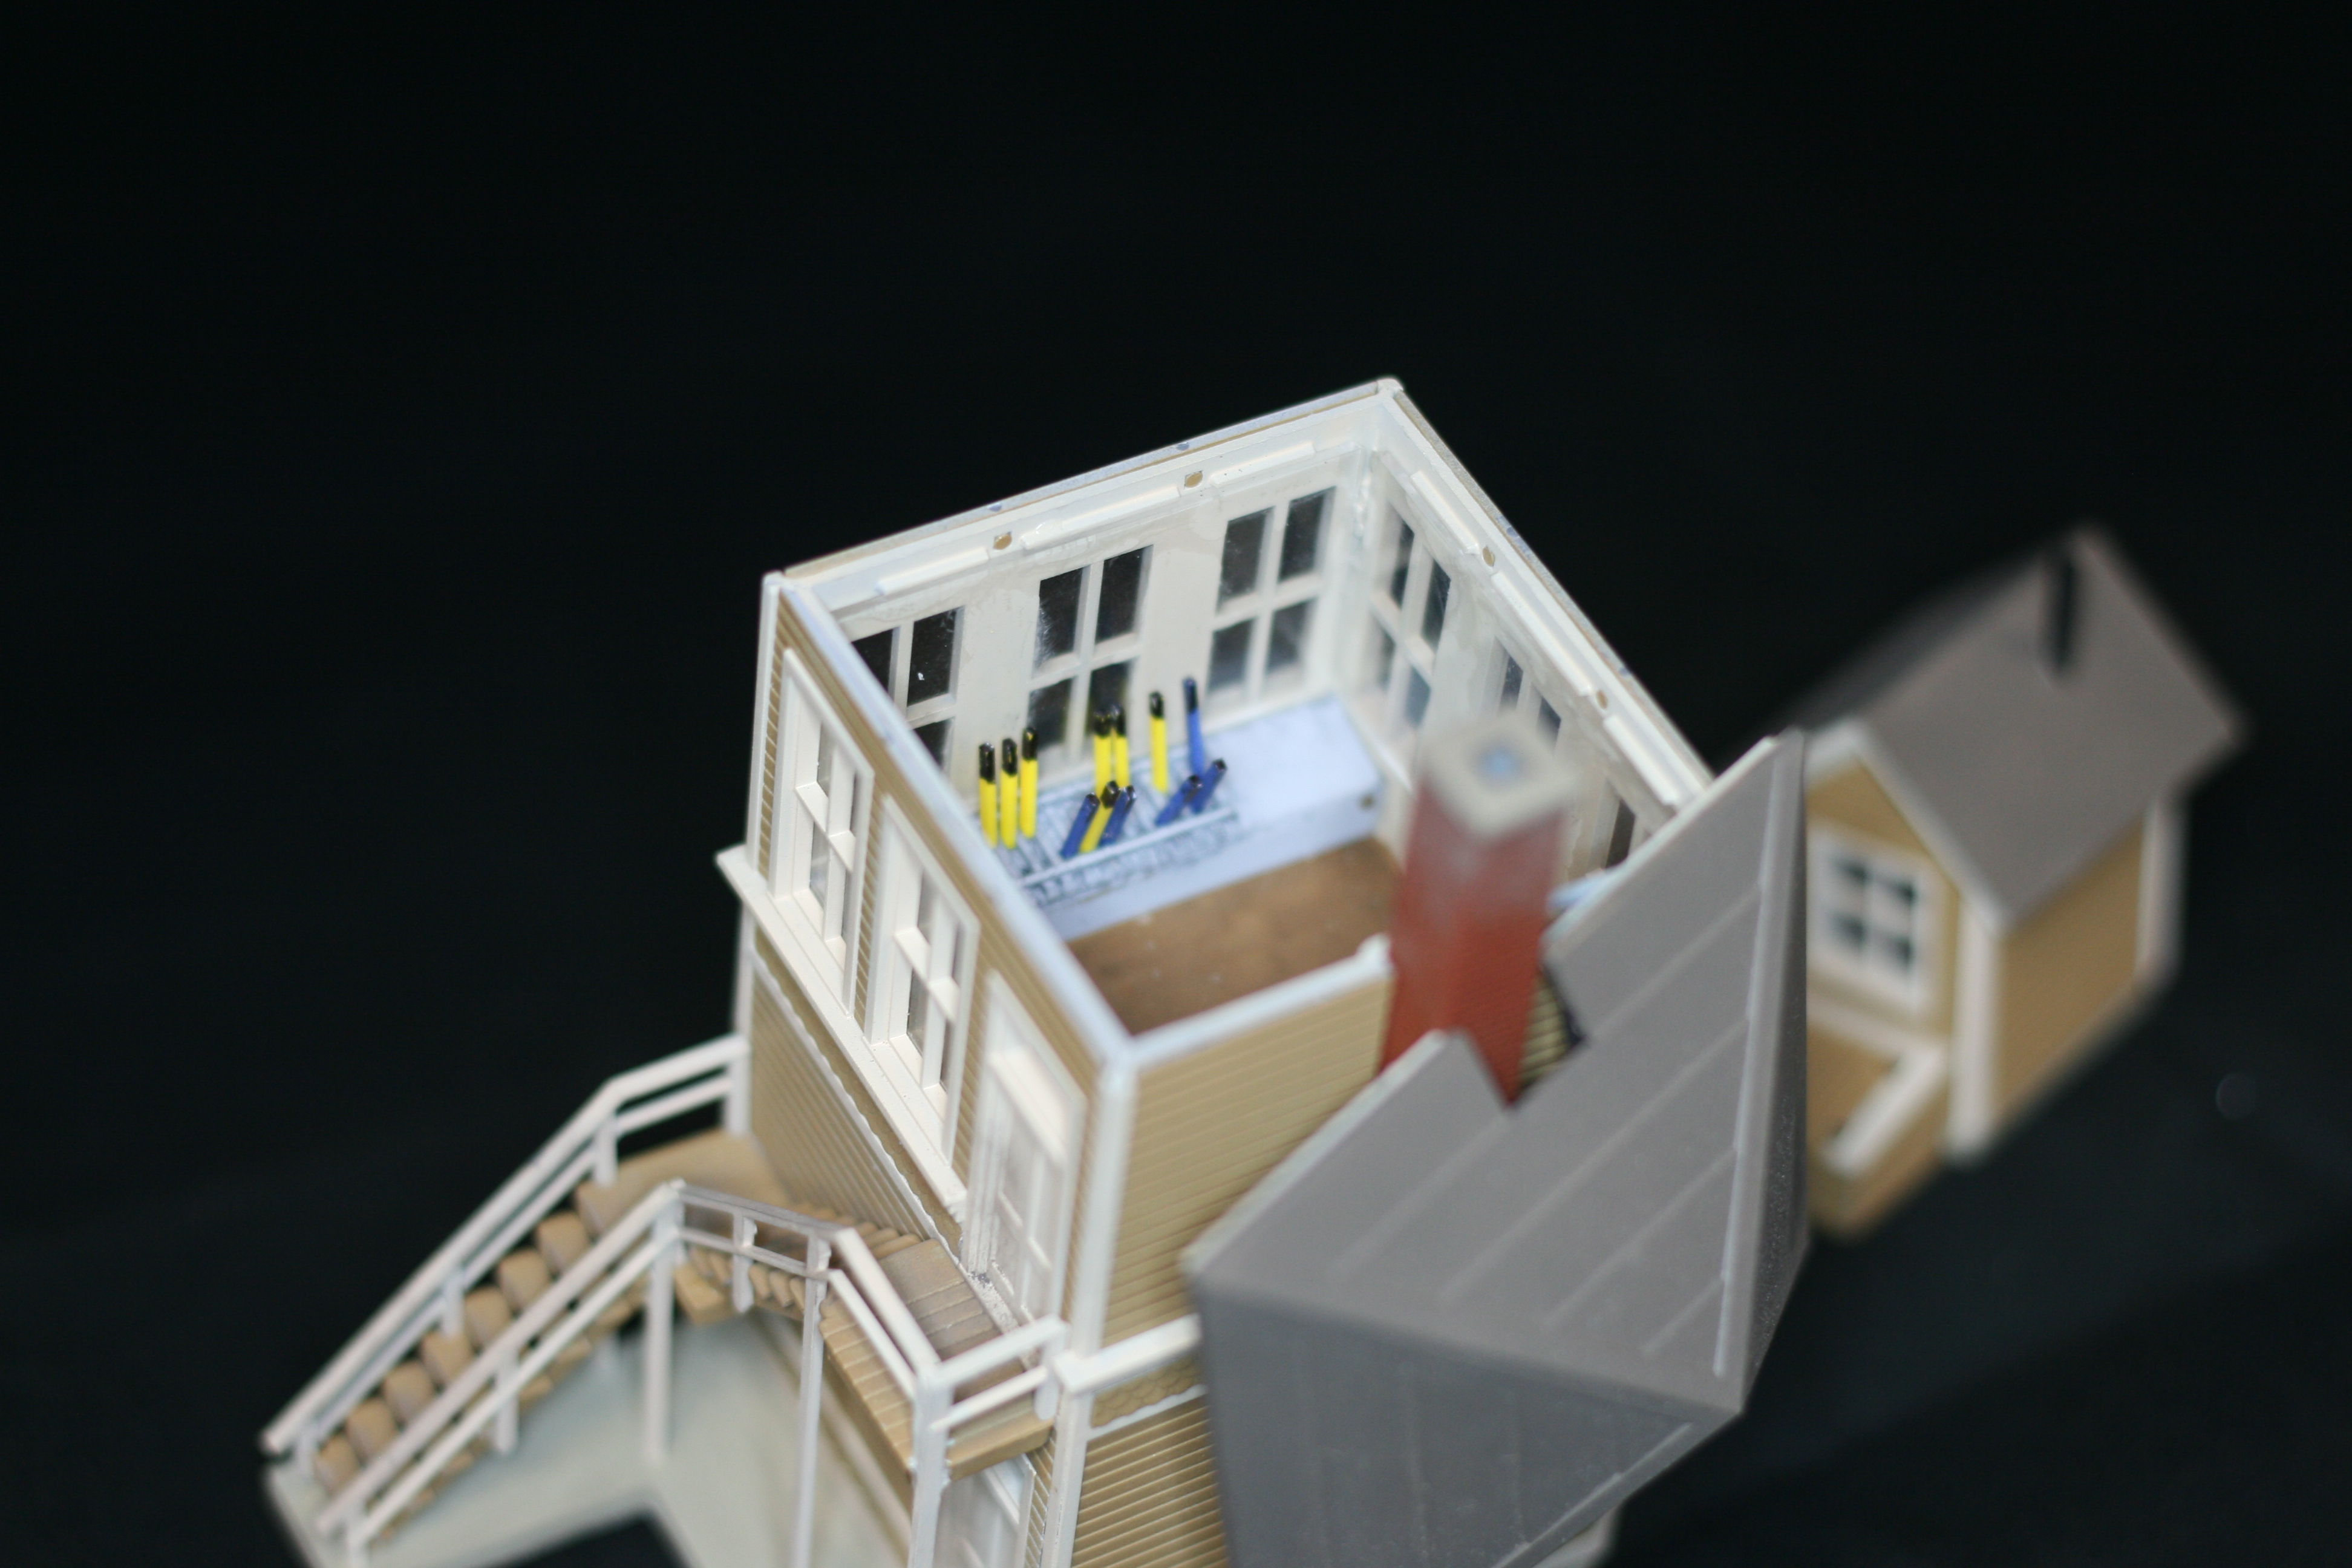
Next is the switch tower. Again it will be on the upper level and thus needed an interior. Since I was only lighting the upper floor that’s where I concentrated the detail. I added the switch levers and a desk area. For now I lightly weathered the building.

Standard small town depot - still to be weathered
Standard small town depot – still to be weathered

Last for now is the standard small town depot. Not much to say about it. Straight out of the box build. I will be replacing the train order boards with working ones from Tomar.


Trackwork started.

Since I’m unable to continue on the bench work due to the “car in the garage” , I thought that I would start laying track since I had already put down the plywood sub roadbed. No great revelations here folks, I’m pretty much old school when it comes to laying track. The roadbed is Midwest cork roadbed, nailed down. The track is then spiked to the roadbed, after the ballast is glued down I go back and pull the spikes on the track so the heads don’t show. This has worked very well for me in the past as when I tore down the old layout I was able to save about 90% of the track and switches by simply soaking the track with water and use a putty knife to lift it up.

I started with the staging yard as this really doesn’t take much planning if you know the length of it.

Laying the roadbed for the staging yard.

I drew the centerlines for the yard tracks and then laid the switches in place and marked their location. I began laying the cork from the switch locations and moved down the yard tracks. I like putting  down the cork and laying track, for me it is relaxing and rewarding. It also tends to move very fast and I had the yard done in a relatively short time.

Roadbed for staging yard complete.
Long view of staging yard from yard throat.

Again starting with the turnouts I put down the track.

Another view down the yard throat.
The start of track laying, the cars are for checking the switches and track.

I used the boxcar and the two passenger cars to check the trackwork as I progressed down the yard. By lightly putting your hand on the car and rolling down the track you can feel irregularities in the track and correct the problem. The same with the passenger cars, plus check the switch points as these will tend to pick the switch points if there is a problem.

Staging yard complete.

I then moved to the upper deck, but first had to correct a problem with the level of the harbor. You know that old saying ” measure twice and cut once “, yeah, well I measured and did the math several times and it was still wrong. I cut spacers and raised the level and then moved on to figure out track location.

Raising the water level in the harbor.
Another view of the strips to raise the harbor.

I had basically two industries planned for this leg of the benchwork, the Hullett unloader and the warehouse / dock scene. So it was just a matter of setting those to things in place and planning the track work from there. Not being a great railroad planner what I did was lay out the tracks that were necessary, the tracks for loading bay and under the unloader, and then adding the track and switches that made them work. I rearranged things several times until I had a layout that made sense, mentally doing switching moves and such. I may have to change 1 or 2 things after I power the section and can actually use the area, but I think it all makes sense.

Track centerlines laid out for warehouse scene.
Roadbed in for the warehouses and dock.
Overview of unloader yard and warehouse scene.
Track work in for warehouses, dock track to be added when dock is permanently installed.
View of track work for the unloader.